Joomla 3.9.18 + Virtuemart 3.8.2 + SP Builder 3.7.2 Documentation
Frontend Editor
There are all information about virtuemart here Support Documentation SP Page Builder (Pro) 3.x
Introduction
SP Page Builder 3 introduces a new level of frontend editing with its brand new frontend visual builder. No more hide and seek. Add the element, click on it, edit it and see what you are changing. No more time consuming- add and open addon, add content, and go to the frontend what you have added. Well, this time we have decided to give you more time to party by saving you from all the hassles. Now with this new frontend editor, you can see your customizations in real time, no need to preview your customizations as everything is happening right in front of your eyes.
The new frontend visual builder is faster than ever before. Now you can do development faster than the Bugatti Veyron Super Sport and you will feel like holding its steering wheel. Whatever you do, will happen in a split second. Now you can add elements and contents on the fly. The new drag and drop system of SP Page Builder 3 takes split seconds for loading elements. Your job is to drag the things, dropping it in the right place, the rest will be done by the editor and before you know it.
Frontend editor open
You can easily get access to frontend editor from the backend of the SP Page Builder 3 where you have created all the pages. There are also several ways to open the editing in the front end. Let's see all of them.
Option 1
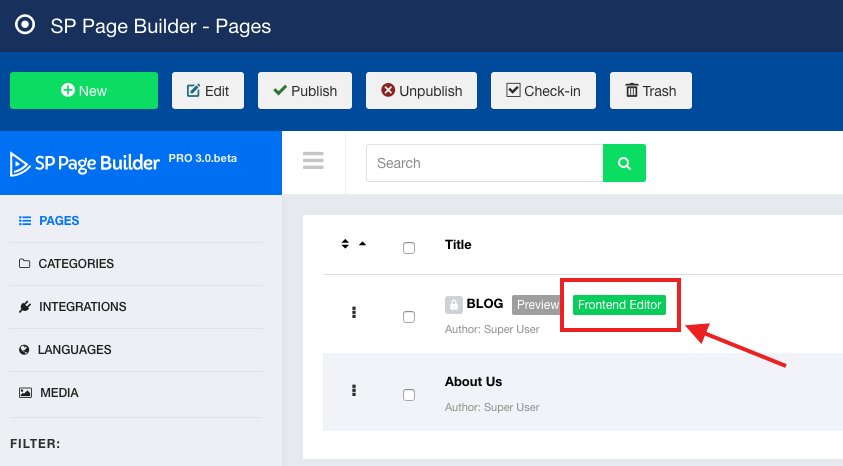
Besides every page you have created in the backend of SP Page Builder 3 you will find two options. One is preview which will allow you to preview your page and another one is frontend editor which will allow you to go to the frontend edit of the page.
Option 2
Open the page by clicking it in the backend editor of SP Page Builder 3. On top of the editor, you will see the option “Frontend Editor”. Click it to go to the frontend editor.

Option 3
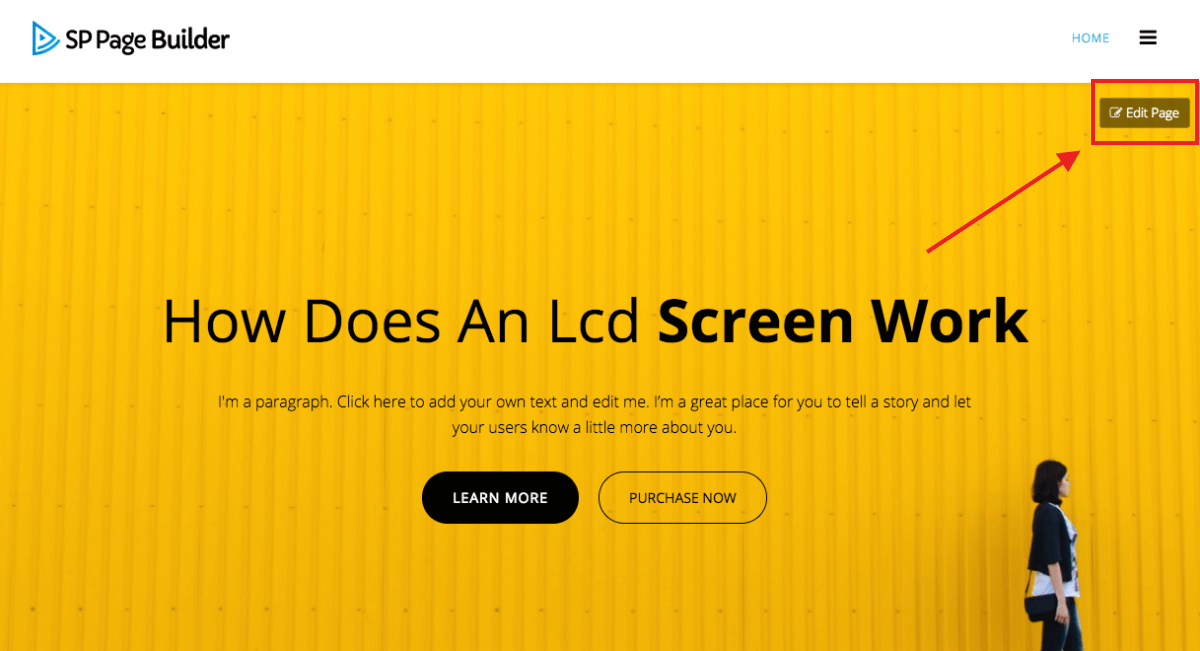
In the preview of every page on the corner, there is an option named “Edit page”. Upon clicking the option the editor will open. Remember you have to be logged in to use this option.
Editor Tools: Know the ways around
Frontend Sidebar
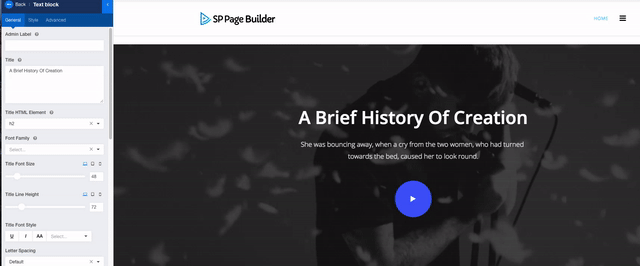
The frontend sidebar is the core of this editor. This allows you to add addon, built-in sections and also you can do all the stylings using this editor tool.
Row editing tool
In the top left corner of every row you will find the tools of accessing the styling options.
Add/Manage column
With this tool, you add new columns in your row or customize your column structure.
Row options
There are several editing options of row. You can get to the row options with and modify the row in your desired way.
Duplicate Row
You can make a duplicate copy of the row you are editing. If two of the row in your page is similar. You can easily duplicate the row and make the necessary modification.
Add new row
With this option, you can add new row. After clicking the option a new row will be added underneath the row you are editing.
Disable row
If you want to disable any raw that you don't want to show, for the time being, you can hide it by clicking disable row option. You can still enable it by clicking the enable button.
Delete row
You can completely delete the row if you want with this option
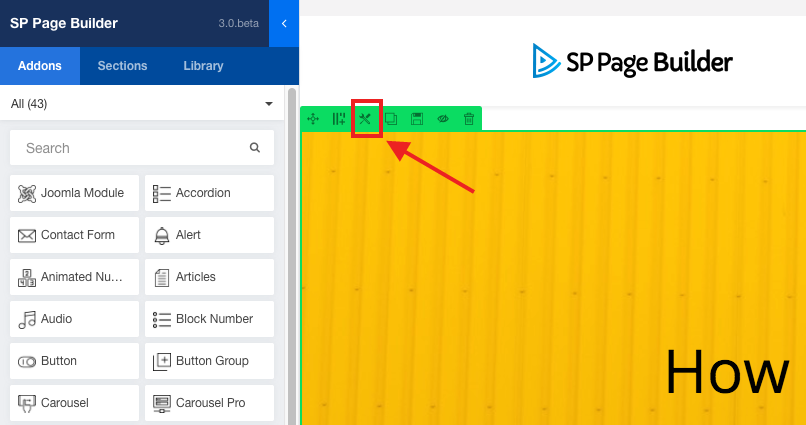
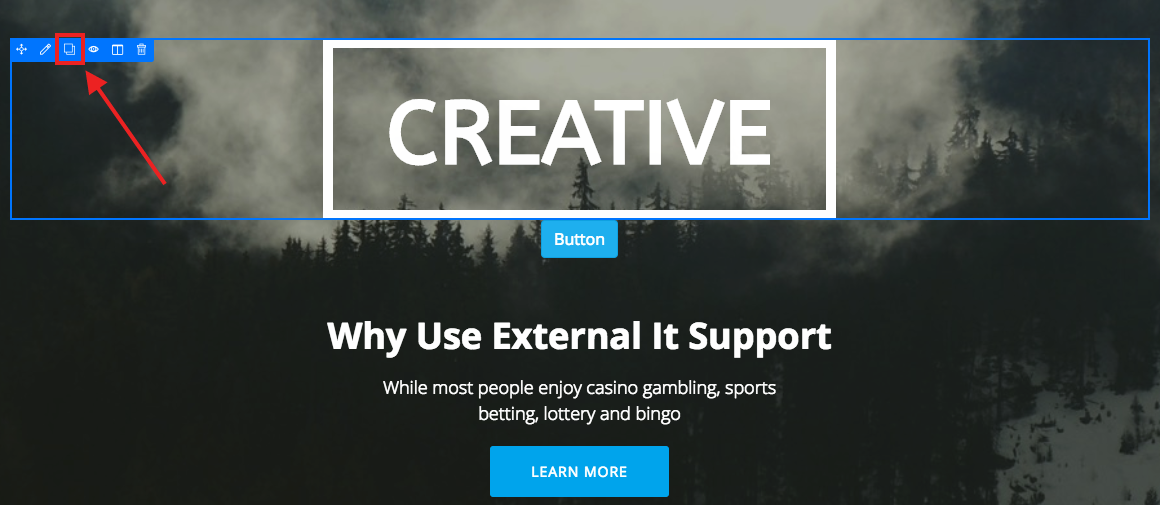
Addon editing tool
In the top left corner of every added addon you will find the tools of accessing the styling options.
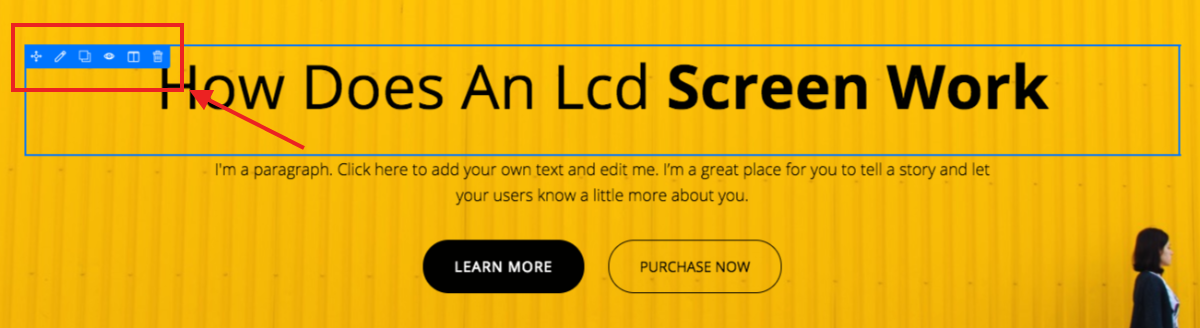
Edit addon
With this option, you can access the addon editing options. There you can add or modify contents and do the necessary stylings
Clone addon
If you want to make a duplicate addon. You can do that using this option. By clicking the option the same addon will be generated.
Disable addon
You can temporarily disable an addon and you can do that by using that option. The addon will be hidden. You enable it by clicking the enable button.
Parent column
This option will enable you to do some customization like adding a new column, editing the options of the column, column move and many other things in this parenting column.
Delete addon
You can totally delete the addon with this option.
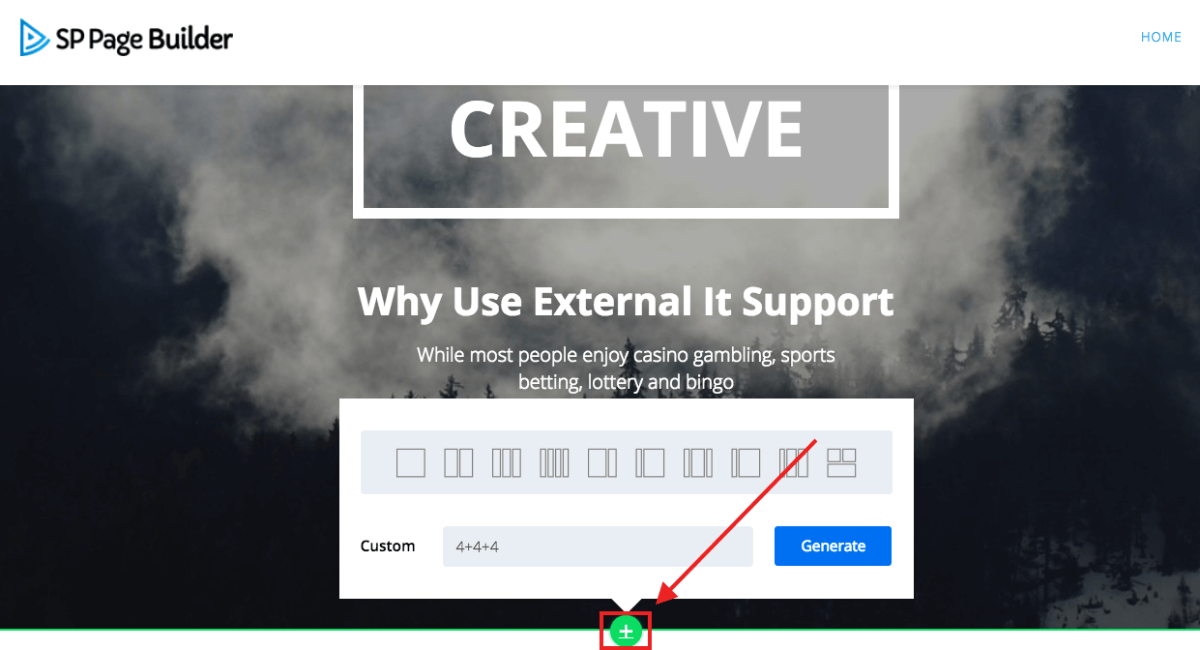
Add new row
Two way you can add a new row on your page in the frontend editor. The options are described below.
Option 1:
In every page, there is an option to add the first row.

Now you have to add the column structure of the row. Click generate and the row will be added.
Option 2
You can find the row addin option at the bottom of every row.
Page Templates
There are 30+ in house templates that you can use on your web page. To find the the templates click the option named "Tools" on the menu in the bottom of the SP Page Builder frontend. The tools option click 'page templates' to see the available templates.
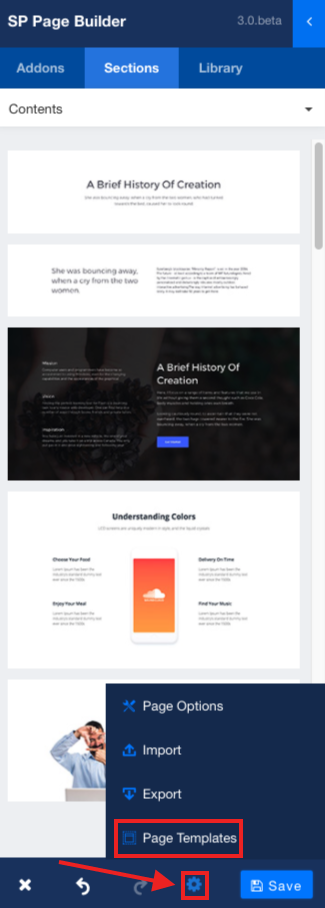
After the select of the option page templates the list of page templates will open. You just have click on the template you think is best for your web page.

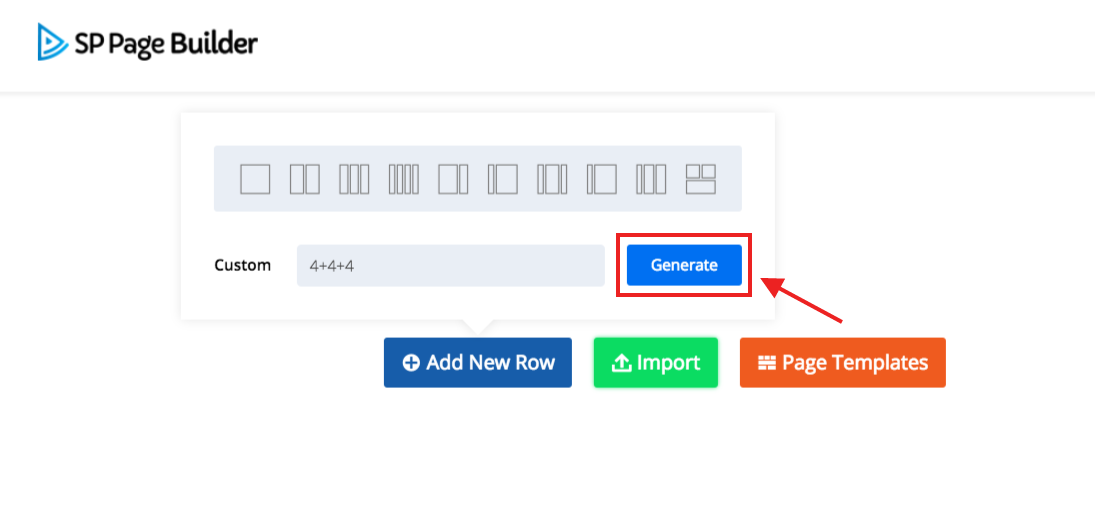
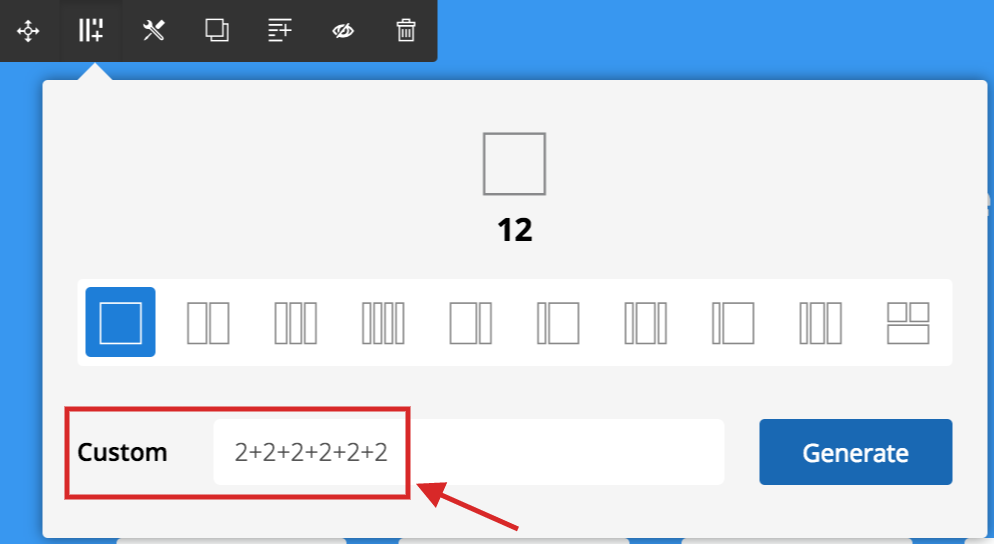
Custom Column Structure
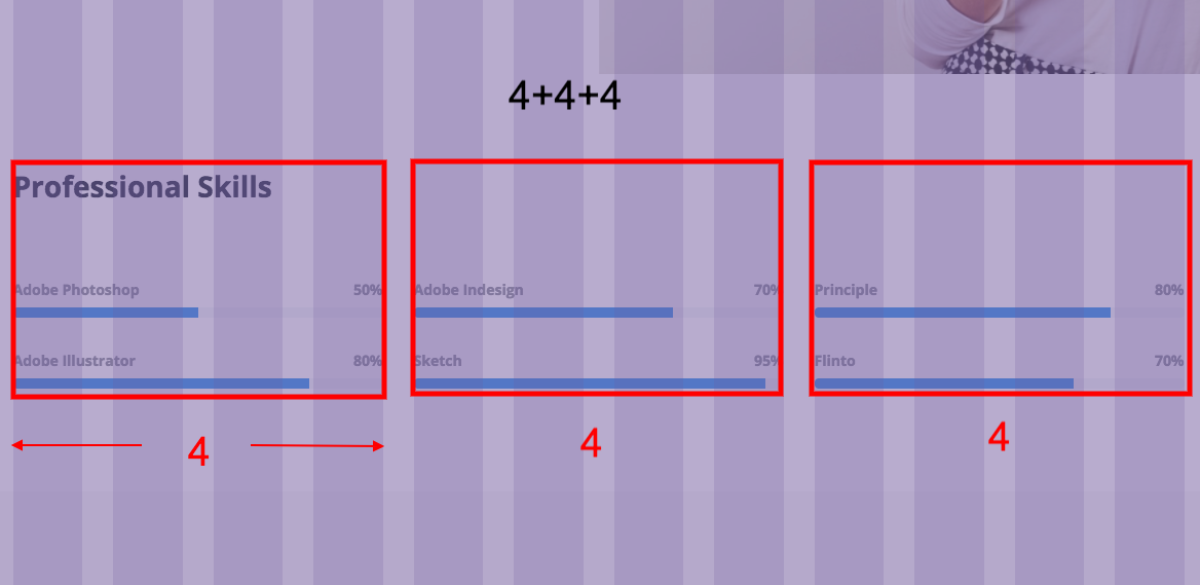
SP Page Builder column structure works as like as bootstrap grid. The full view is divided in twelve grids. You have to select or write down your column structure according to the bootstrap grid. For example you want three columns in your row. In that case we have to divide our screen into three parts. So according to bootstrap our screen has twelve grids. So if we divide that into three columns than every column gets four grids. Then we have to select or write down 4,4,4. That means my first column has four grids like the second and third column.
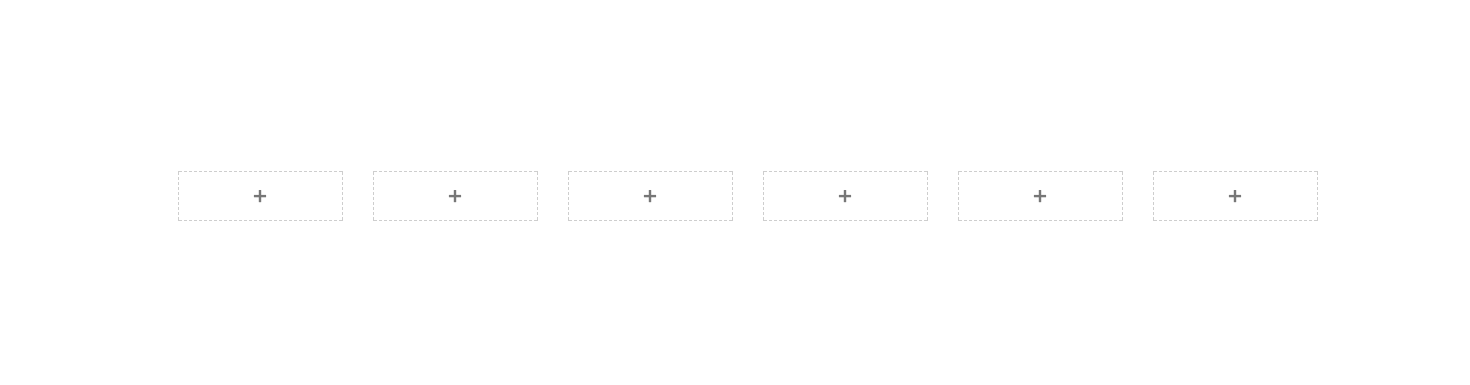
Example : 2+2+2+2+2+2 : Six column
If you want six different column in a row then you have to manually first put your custom requirement in the text field named "custom".
Output
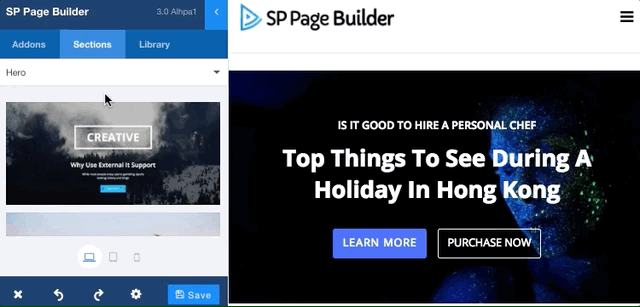
Built-in-sections
You have numerous drag and drop built in block designs of various sections of your website. To find the built-in sections click on the sections tab on the menu of the frontend sidebar.
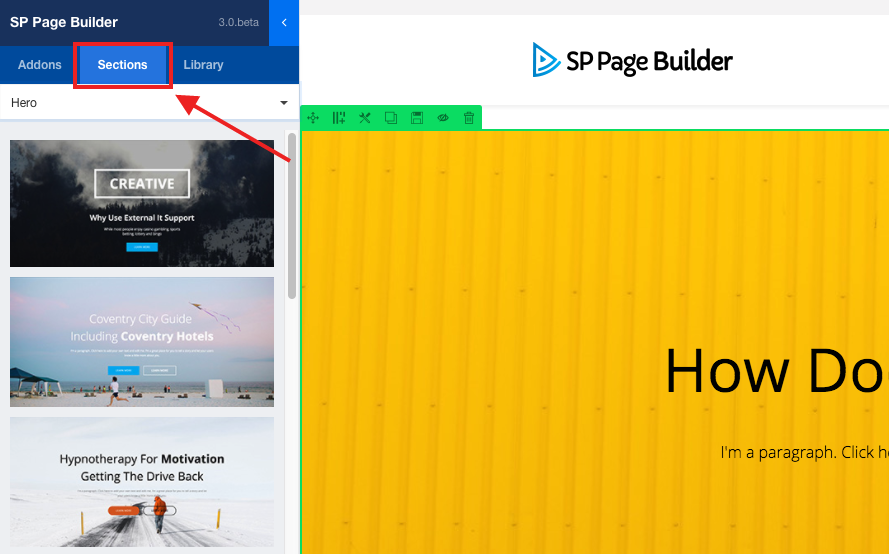
Section designs
Right now you can find these following section designs.
- Hero (Header)
- Features
- Contents
- Pricing
- Call to action
- Team
- Testimonials
- Contacts
To get the design choose the section from the drop down list of sections. The designs will appear accordingly.
Sections add
Section modification
There are several options which you can use to modify the sections. Here we will style the header section. To access the styling you have to use the regular options in row and addon. Click on the row edit button to access the row editng options. For addons click on the addon editing button.
Access Row styling
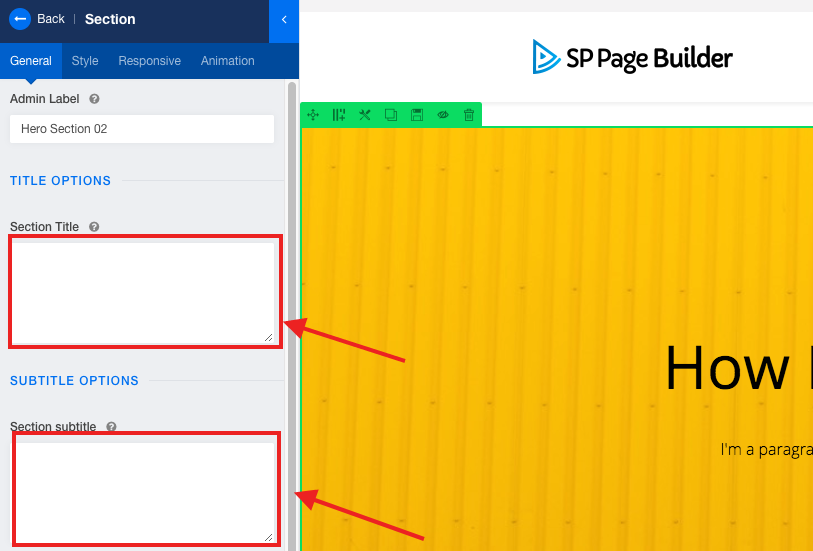
Add section title & subtitle
To add the section click on the row editing option. In the "General" tab you will find two text boxes named "Section Title" and "Section Subtitle". Add your title and subtitle texts in these textboxes.
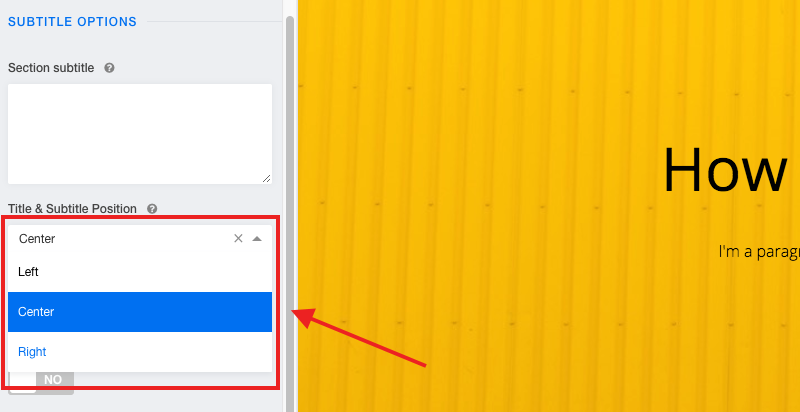
Title & Subtitle position change
To add the Title & Subtitle position click on the row editing option. In the "General" tab you will find "Title & Subtitle Position". From the drop-down menu select your desired positions.
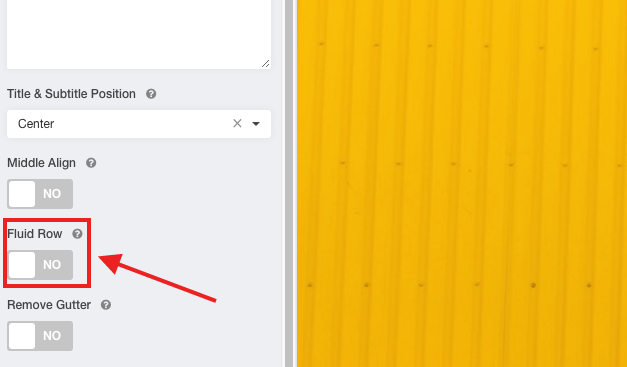
Make row fluid
To make the row fluid click on the row editing option. In the "General" tab you have to enable the row fluid button.
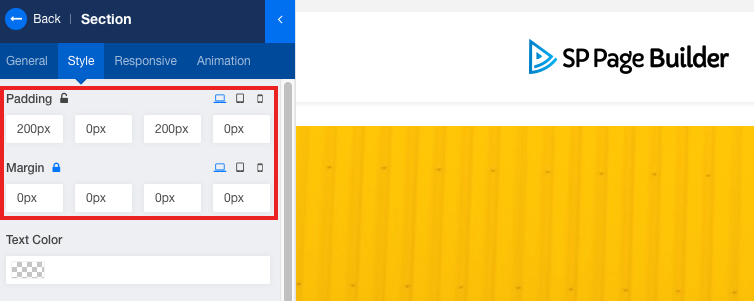
Add Padding/ Margin
To add padding and margin for your row click on the row editing button. Now click on the "style" tab from the menu. Here you will find fields to add your desired padding and margin.
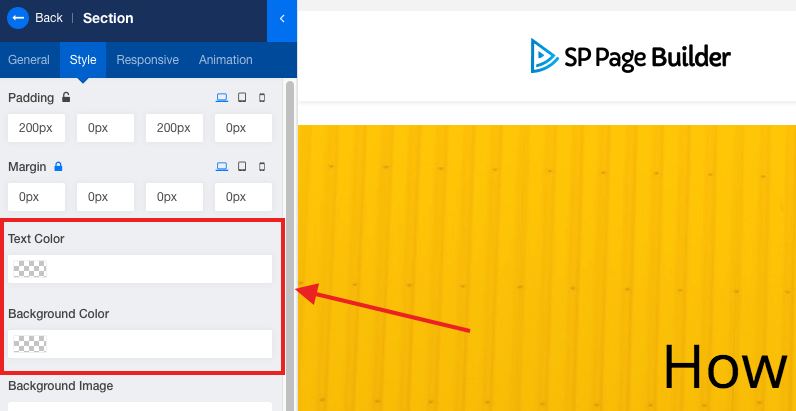
Text color and Background color change
To add the text color and background color go to the "style" tab. Here you will find two fields "Text color" & "Background color". Use the color picker tool to select your desired color.
Background image change
To change the background image go to "style" tab of the sidebar menu. Now scroll down and see the option "Background image". Here in this option use the media manager to upload the background image.

Make background parallax
To make the background of your section parallax. Go to the "style" tab of the frontend menu and scroll down. Enable the option "Parallax Background" and you are all set.

Add Overlay
To add an overlay, find the option "overlay" in the style tab. Use the color picker to select the color. Also, you have the option to adjust the opacity of the color.

Enable & add video background
If you want to add a video to the background go to "Style" tab in the frontend menu. Scroll down and you will find "Enable video background". Now you have to enable "Enable Youtube/Vimeo Video in the Background". Now add the link of the youtube or the vimeo video link.

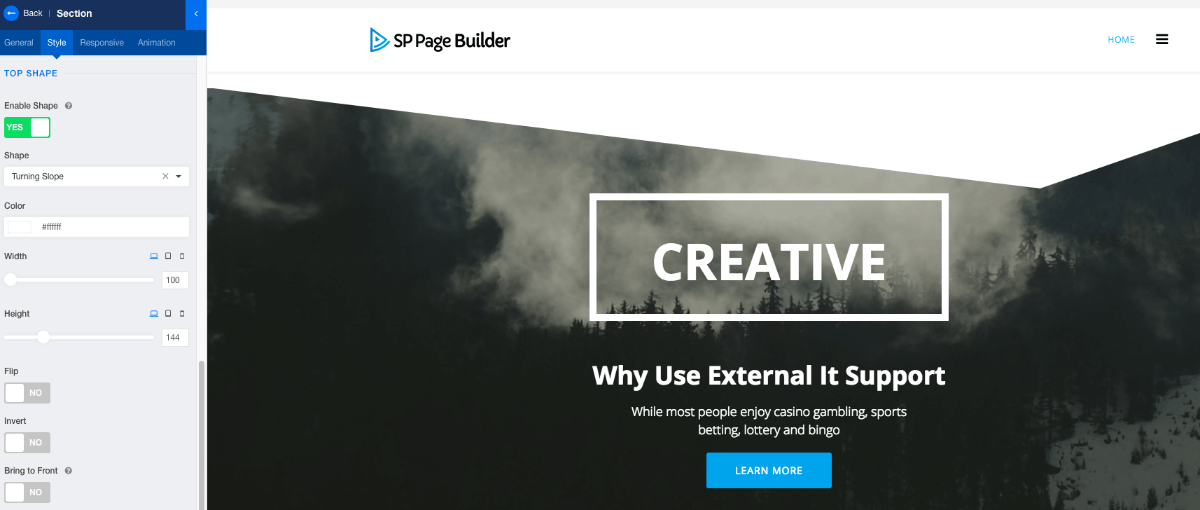
Enable Shape
To add shape first you have to enable shape. To enable it go to the style tab of the frontend menu. There enable shape for top and bottom. If you want to add shape at only top, just enable the top shape.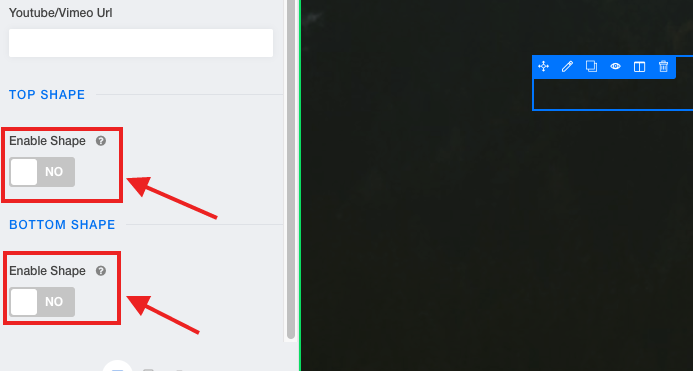
Top Shape
Enable Shape
This will enable the options of adding the shape.
Shape
There are 10+ shapes to add. Add your desired one.
Color
Set the color of the shape using this option.
Width
Set the width of the shape. Use the wheel to adjust.
Height
Set the width of the shape. Use the wheel to adjust.
Flip
This will flip the design. If the slope is on the right side, it will be flipped to the right side.
Invert
This will invert the design of the shape. If the slope is downward, it will be inverted upward.
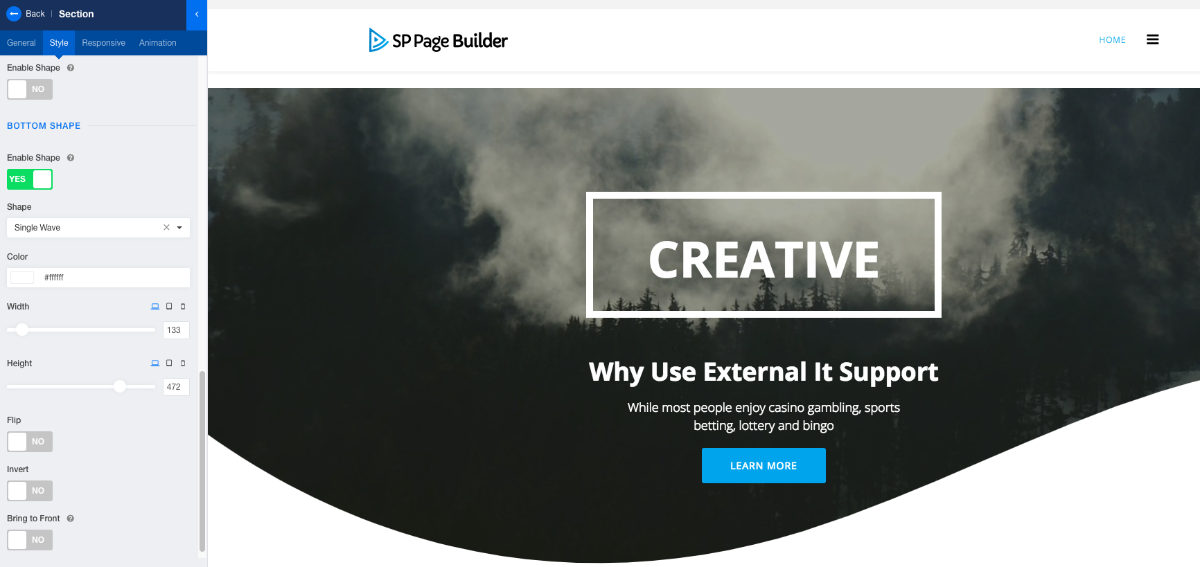
Bottom Shape
Enable Shape
This will enable the options of adding the shape.
Shape
There are 10+ shapes to add. Add your desired one.
Color
Set the color of the shape using this option.
Width
Set the width of the shape. Use the wheel to adjust.
Height
Set the width of the shape. Use the wheel to adjust.
Flip
This will flip the design. If the slope is on the right side, it will be flipped to the right side.
Invert
This will invert the design of the shape. If the slope is downward, it will be inverted upward.
Access addon stying
To go to the addon editing options, click on the addon edit button.

Addon add
This is how you add an addon.

Addon Cloning
To clone an addon click on the clone addon icon in the addon menu.
Disable Addon
To disable an addon click on the disable addon icon in the addon menu.
Live editing
You don't have to go anywhere to add text or modify it. You can do all that in the frontend.
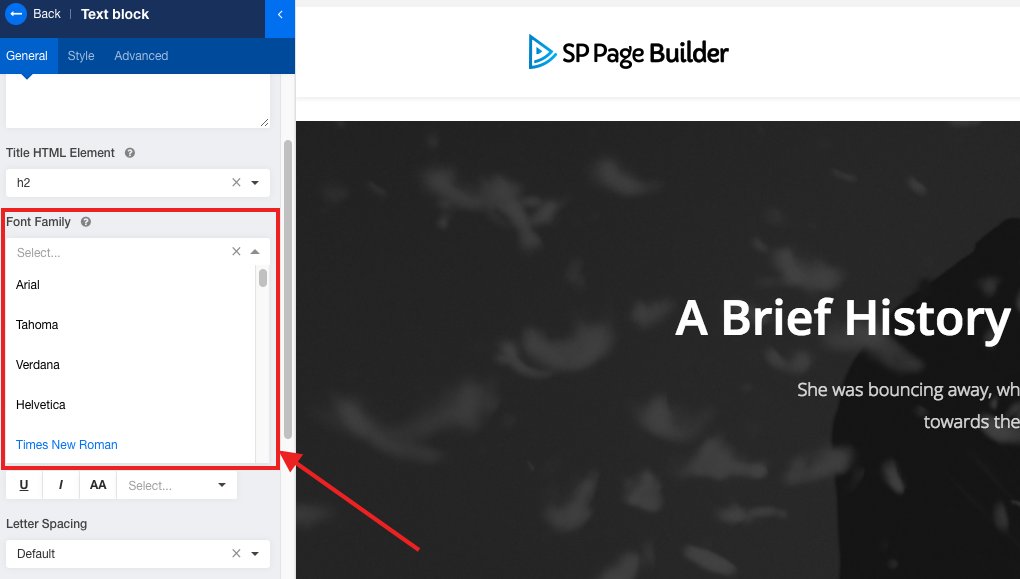
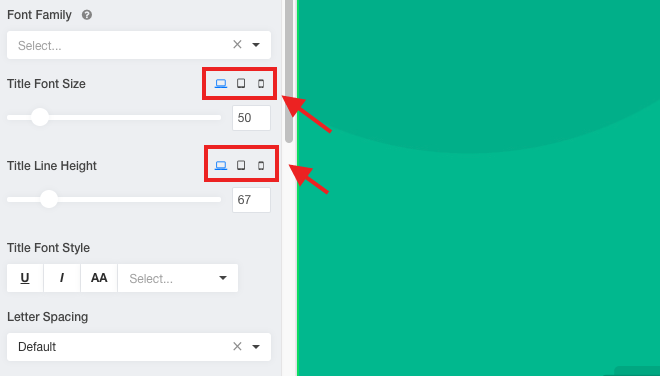
Font family change
You can now change the font-family of your text with ease. To do that click on the addon edit icon. Here you can find the option of changing the font family. Choose your desired font family from the long list of google fonts available.
Easy font size change
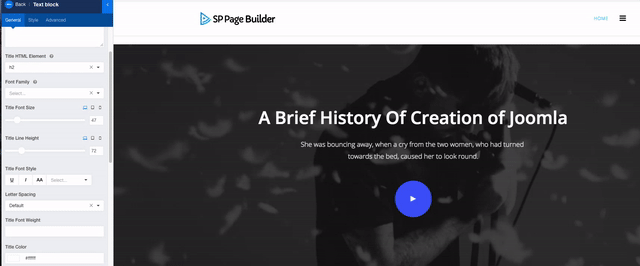
Font Style & content alignment
You can adjust the letter spacing and content alignment of your added content. First, click on the addon edit icon. Go to the "Style" tab of frontend editor. Scroll down and you will find the fontstyle changing option also the option ofd aligning the content.

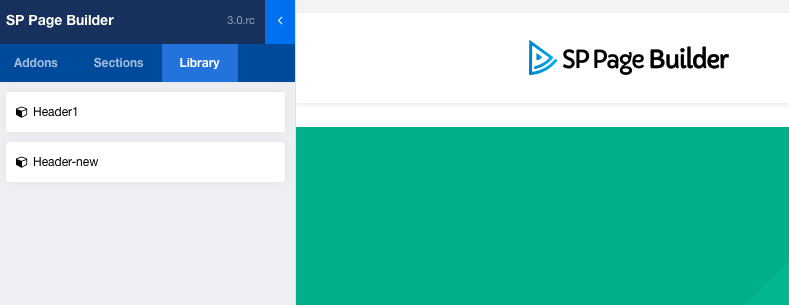
Library System
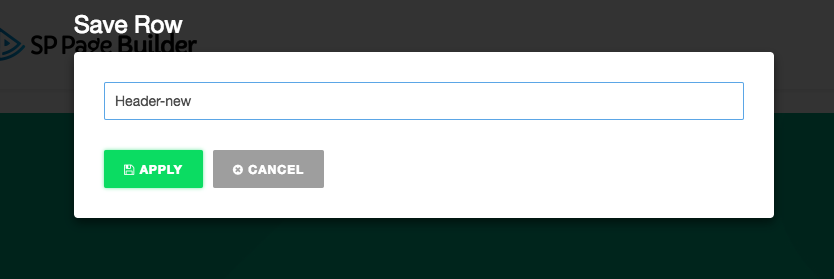
Library system is the newest feature of SP Page Builder 3. Now if you have a section that you want to use it later in the different pages. Using the library system first you have to save the row. The saved page will be stored in the library. Whenever you need you can drag and drop the saved section tour page layout.
Step:1 Save section

Step:2 Give it a name
Step: 3 Find it in the library
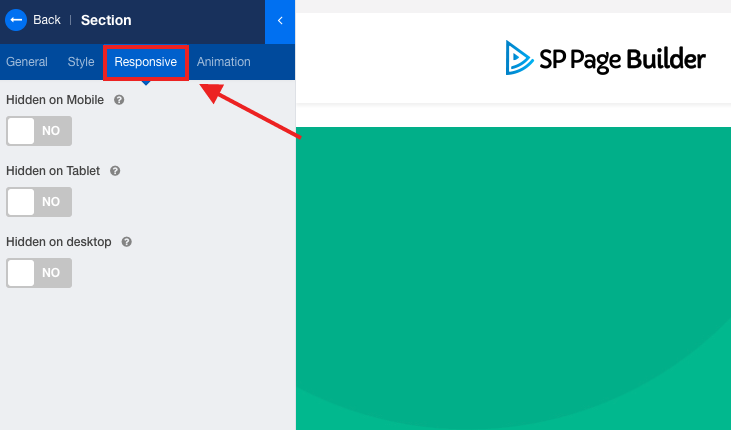
Responsive
Now you can adjust the responsiveness of your website with frontend editor of SP Page Builder 3. You can find the responsive control button at the bottom of the editor. Switch to various devices and check out the design. The modifications you made in various devices will only be applied to those devices.

Element responsive
You can do responsive design the elements you have added in the section row. You can find the tool in its style section.
Hide column for responsive
You can hide any section or addon content for various devices to cope up with the responsive issue. For that you need to go to the responsive tab of the frontend menu. There you have to enable the option as per your desire.
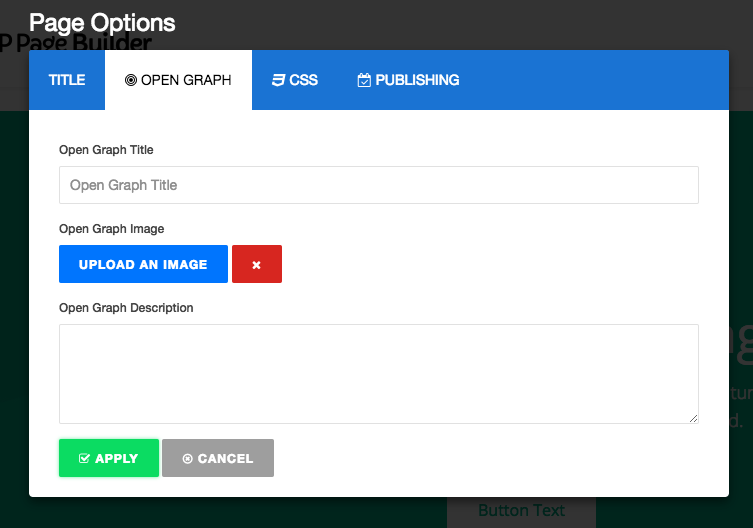
Page options: Open Graph
To use the open graph feature, you have to click settings icon at the bottom of the editor. Now select the "Page options". Here you will find several options. Select Open Graph from them. Here you have to do all the customization to use the open graph feature.
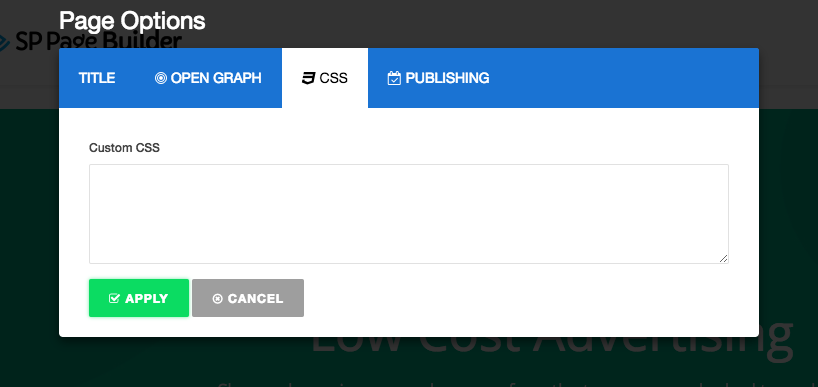
Custom CSS
To add custom CSS, you have to click settings icon at the bottom of editore. Now select the "Page options". Here you will find several options. Select Custom CSS from them. Add your custom CSS here.
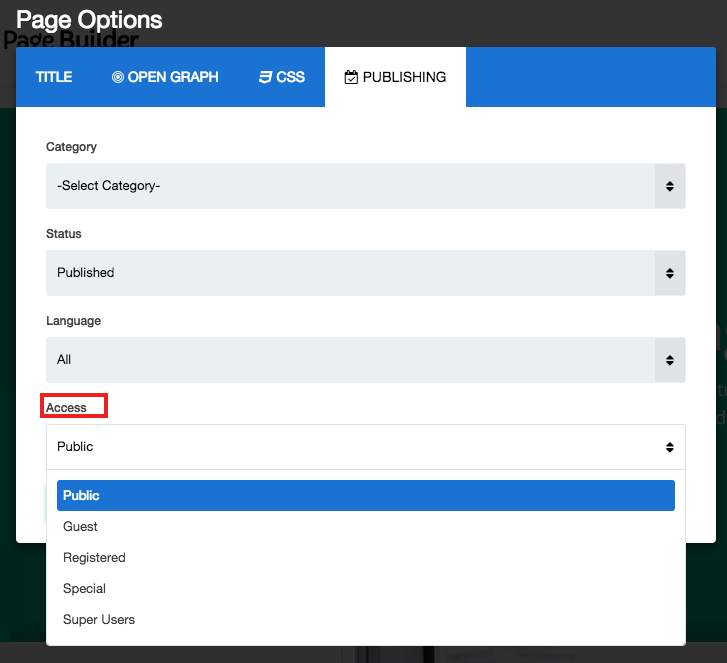
ACL control
To use the access control feature, you have to click settings icon at the bottom of editore. Now select the "Page options". Here you will find several options. Select "Publishing" from them. Control the access here.
Import/Export
Undo/Redo
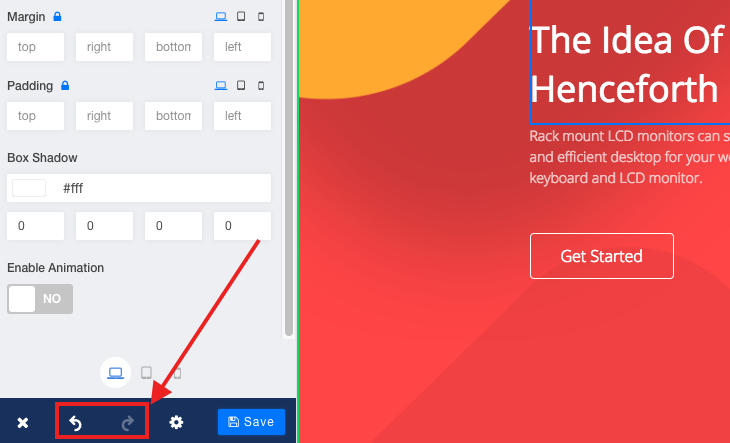
You can do unlimited undo and redo. Whatever your mistake is you can regain the previous customization by clicking the undo button also if you undo anything and want to go back to the thing you have customized, you can easily do that using the redo button. Both the button is at the bottom of the front end editor menu.
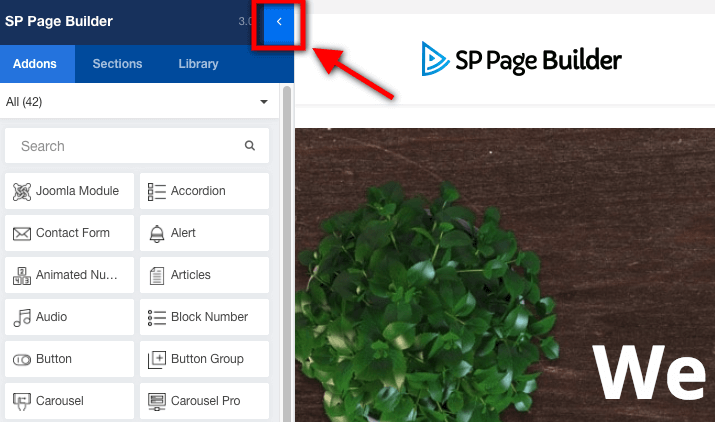
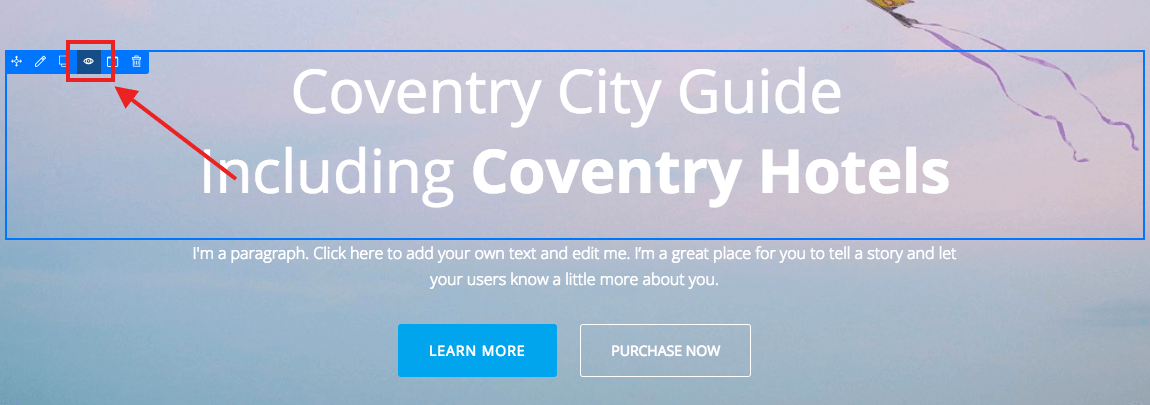
Frontend sidebar hide
To hide the frontend sidebar, click on the icon indicated in the screenshot.