Joomla 3.9.x Documentation
Getting started
If you don't don't understand how to install templateб please watch the video Flatastic installation. It's the same process https://www.youtube.com/watch?v=kN3ZO8vwPRg
This method lets you install Joomla CMS engine, Joomla template, sample data and all the necessary extensions.
Creating a database
Once you've completed uploading the files to a hosting-server, you should prepare an empty database for your Joomla website. It should be created with the help of the database management tool in Hosting CPanel [MySQL Databases typically].
Follow the simple instructions to create a new database through the cPanel [check the slides below]:
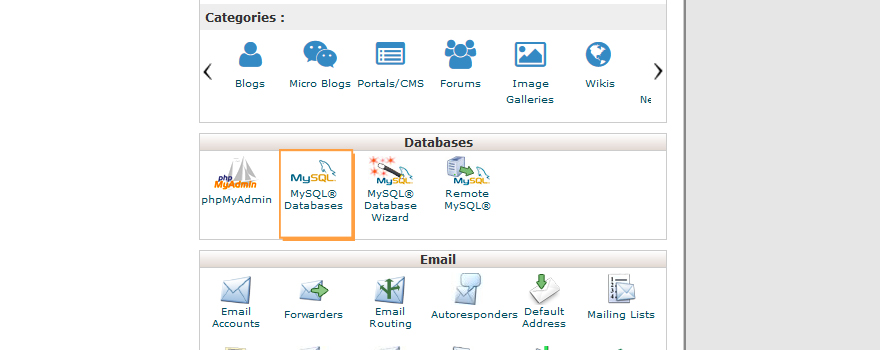
- In order to access the list of databases, press the "MySQL Databases" button in the navigation menu.
- Input the database name in the "New database" field.
- Press the “Create Database” button.
You will see the new database in the listing. Click on the database name link in order to get access to the one.
Check the instruction accompanied by the illustrations [click on switches to move on]:
1. Open the “MySQL Databases” tab in order to access the database listing:
2. Enter the database name and Press the “Create Database” button:

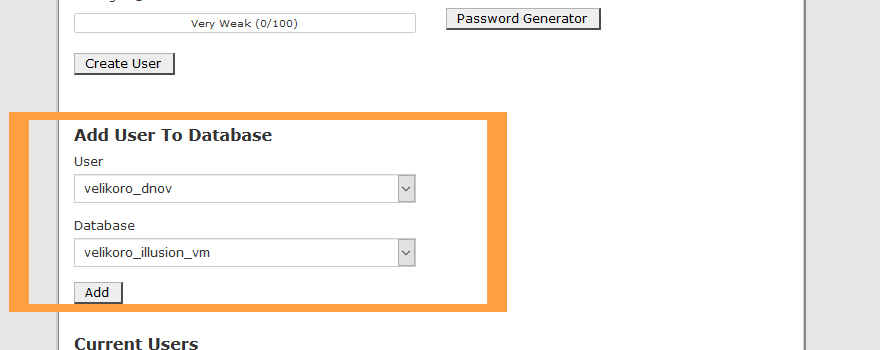
3. Apply your user to Database:
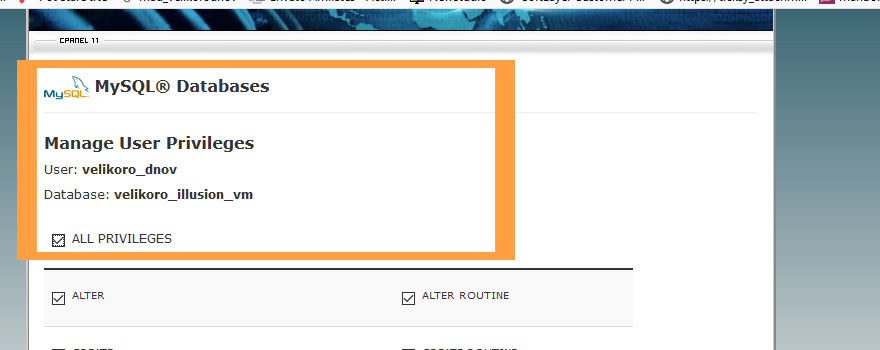
4. Give all Privileges:
Should there be any issues when database creating, please contact your hosting provider to assist.
Uploading and Unzipping
To start working with Joomla, you need to upload files to your hosting server first. This can be accomplished either by your Hosting CPanel File Manager or FTP-client.
Follow the simple instruction:
- Open the template and access to 'joomla' folder.
- Select the 'unzip.php' and 'fullpackage.zip' files and upload them to your server. I advice to use cPanel for upload and Extract files].
-
Enter the pass to 'unzip.php' file on the server [http://your_domain_name/unzip.php] in the address bar.
-
You will see the following window:
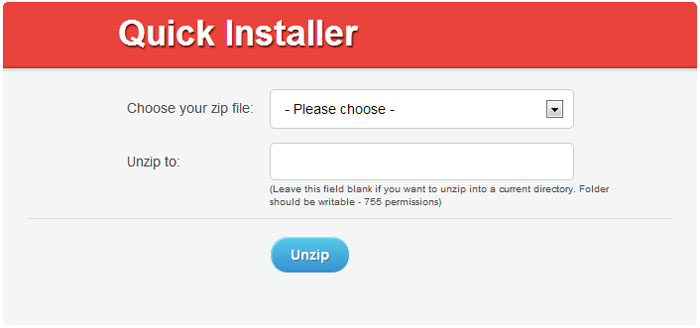
- In the field 'Choose your zip file’ select the uploaded fullpackage.zip file .
- In the field 'Unzip to’ choose the folder to unzip files.
- Press the 'Unzip’ button to unzip files.
- Another method:
- Upload file via cPanel and Click Extract button.
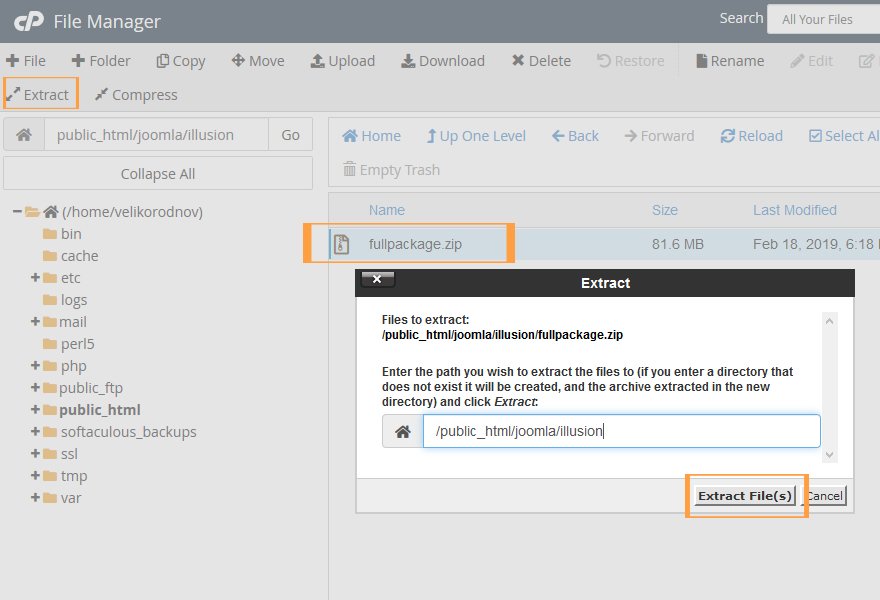
Make sure you've set the correct permissions type for the unzipping files folder. The permissions should be CHMOD 755 or 777, depending on the sever configuration.
Joomla CMS Installation
Please, complete all the preparation steps and install all the necessary software.
Open your browser and enter the path to Joomla folder in the browser address bar [for example, http://your_domain_name/joomla]. You will see the Joomla CMS Installation window.
Website configuration
In the “Select Language” dropdown menu , select the language of your Joomla installation-master.
Attention: in the “Select Language” dropdown menu you have an option choose the language of the Joomla installation process only. You not select your website language.
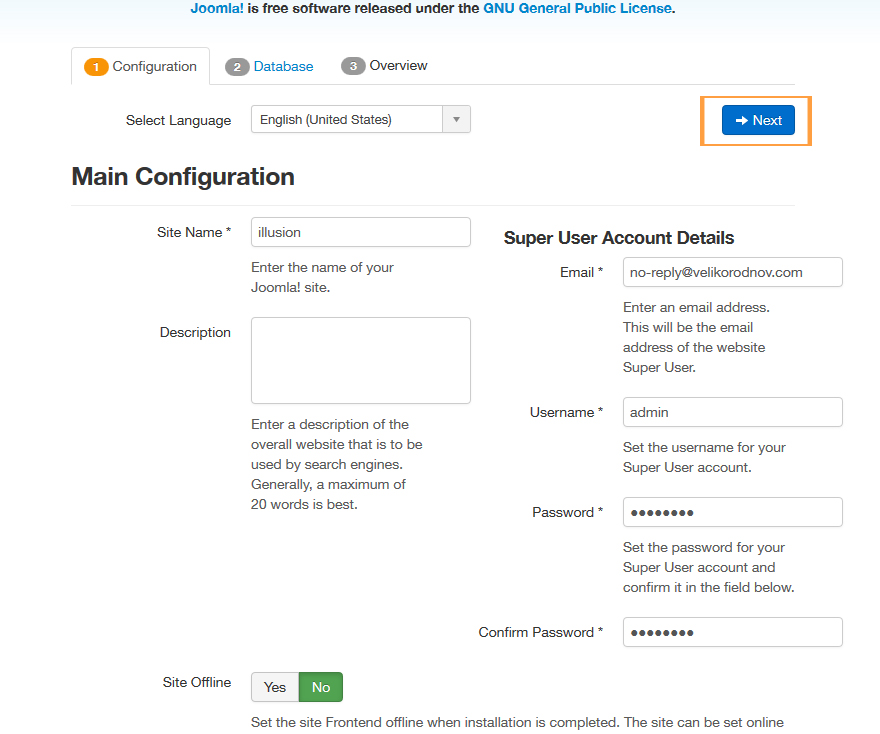
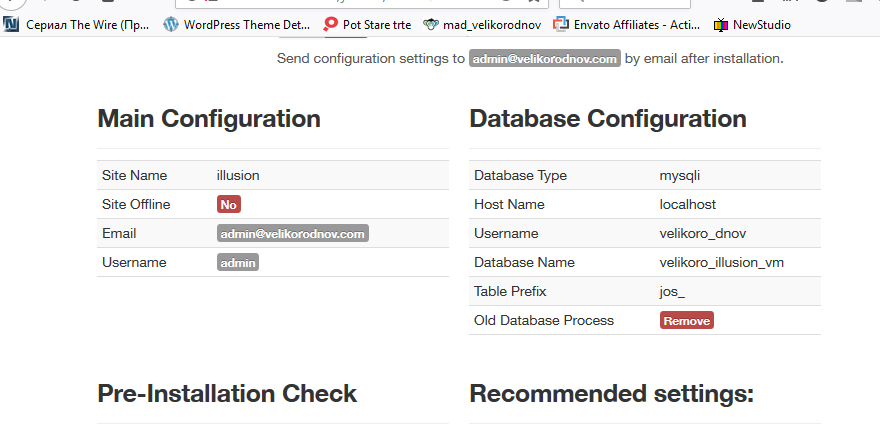
Fill in all the form fields of the “Main Configuration” section. Be sure to complete all fields that are marked with an asterisk [ mandatory field].
Please fill in the fields: "Admin Email", "Admin Username" and "Admin Password" in the right column in order to create a new Joomla website user with admin rights.
"Admin Email", "Admin Username" and "Admin Password" each, is necessary for accessing Joomla website admin panel. Please keep the data confidential.
Once you've entered all the data, press the Next button in the upper right corner:
Database configuration
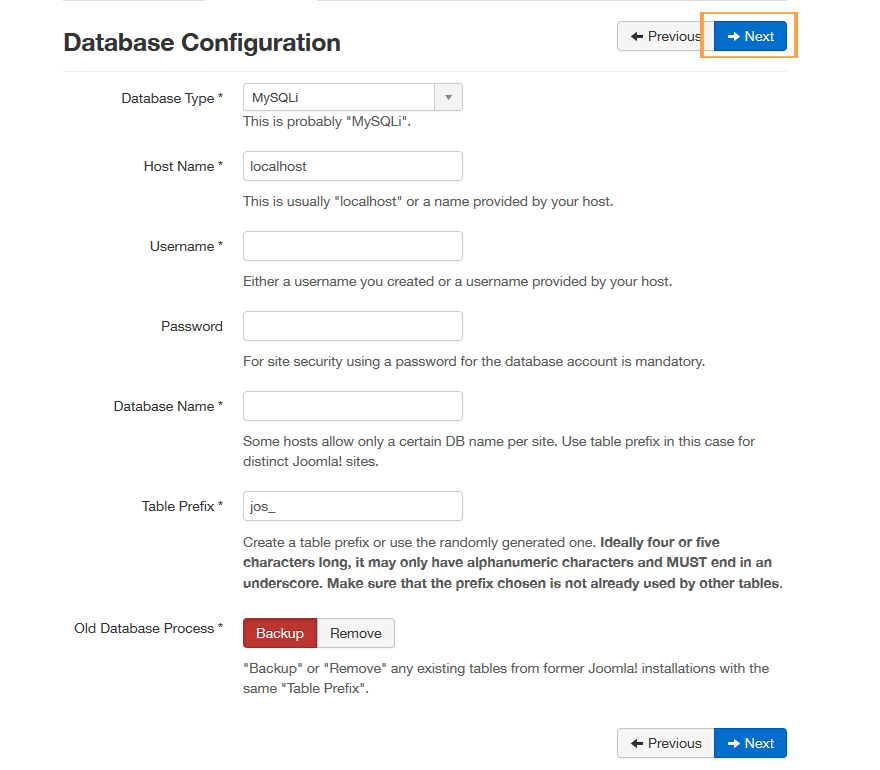
Then you need to input your database details. Please, contact your hosting provider to get the correct details.
Installing Joomla from scratch, you should just enter "Host Name", "Username", "Database Name" and "Password". You can normally leave other options set to Default. However, there can be some differences depending on your hosting provider.
Once you've entered all the details, press the Install button:
Overview
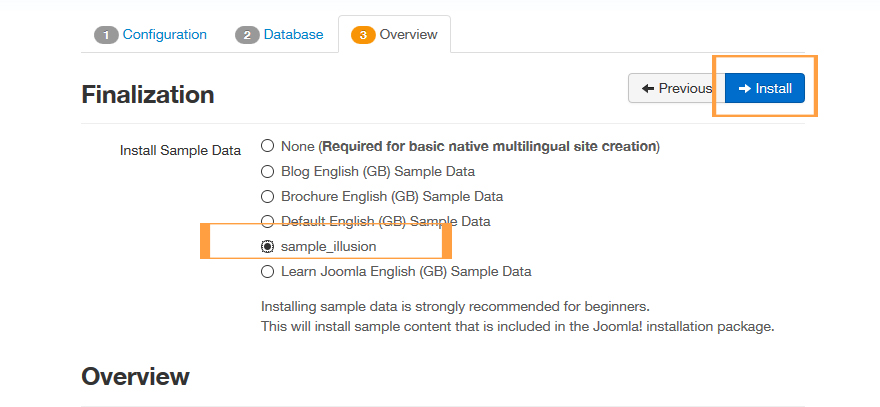
Joomla CMS installation is almost complete now. At the “Overview” stage you need to select, whether you want to install Joomla Sample data or not.
Attention: Sample Data are necessary to make your website similar to the template Live Demo: with all the sample images, texts and saved module settings. To import sample data, please choose Sample Data with the title "sample_ilusion.sql".
Please select sample data in case you want to install them or press "None", if you no sample data to be on your Joomla website:
You can check, whether the database configuration and admin panel access details are valid, and e-mail it:
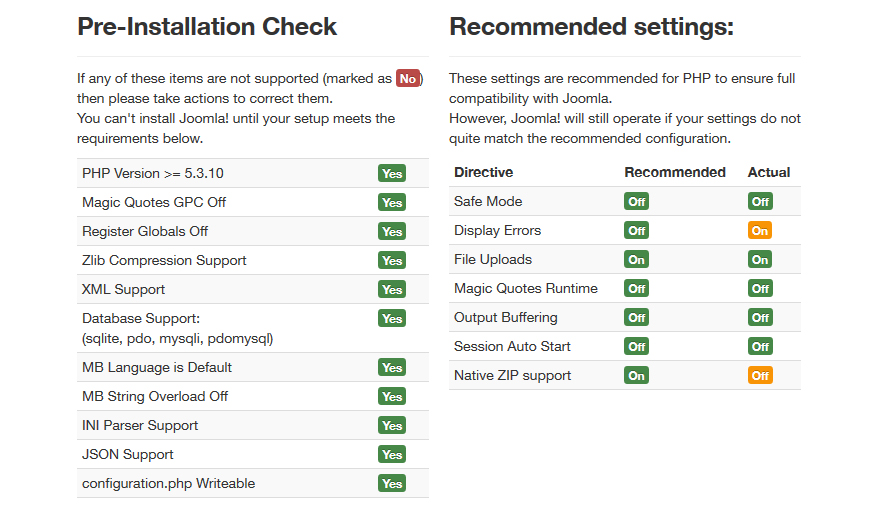
You can verify your hosting server conformity with the Joomla requirement and check your installation settings once again. Should warning notification boxes are displayed on the "Recommended settings" section, please contact your hosting provider for further assistance:
Click the Install button to proceed.
Installation Complete
Congratulations! You have successfully installed Joomla CMS.
As you see, it is not that complicated.
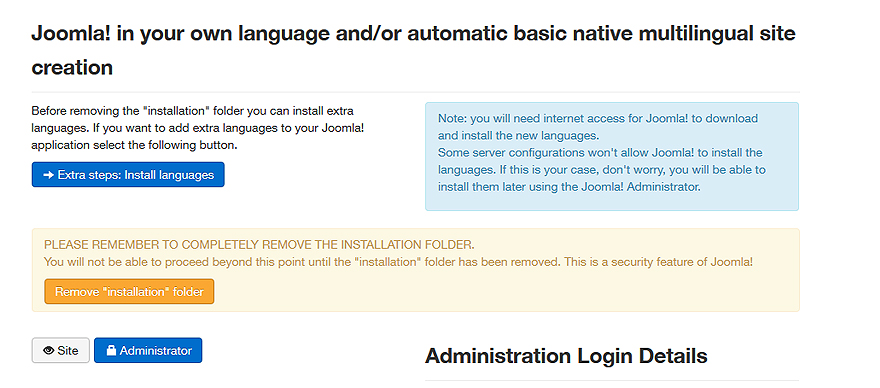
To enhance security level, please delete the "Installation" folder from your Joomla root directory.
Now you are ready to proceed to your Joomla CMS based website configuring. Click the “Site” button, in order to open your website or press “Administrator" to access your Joomla admin panel.