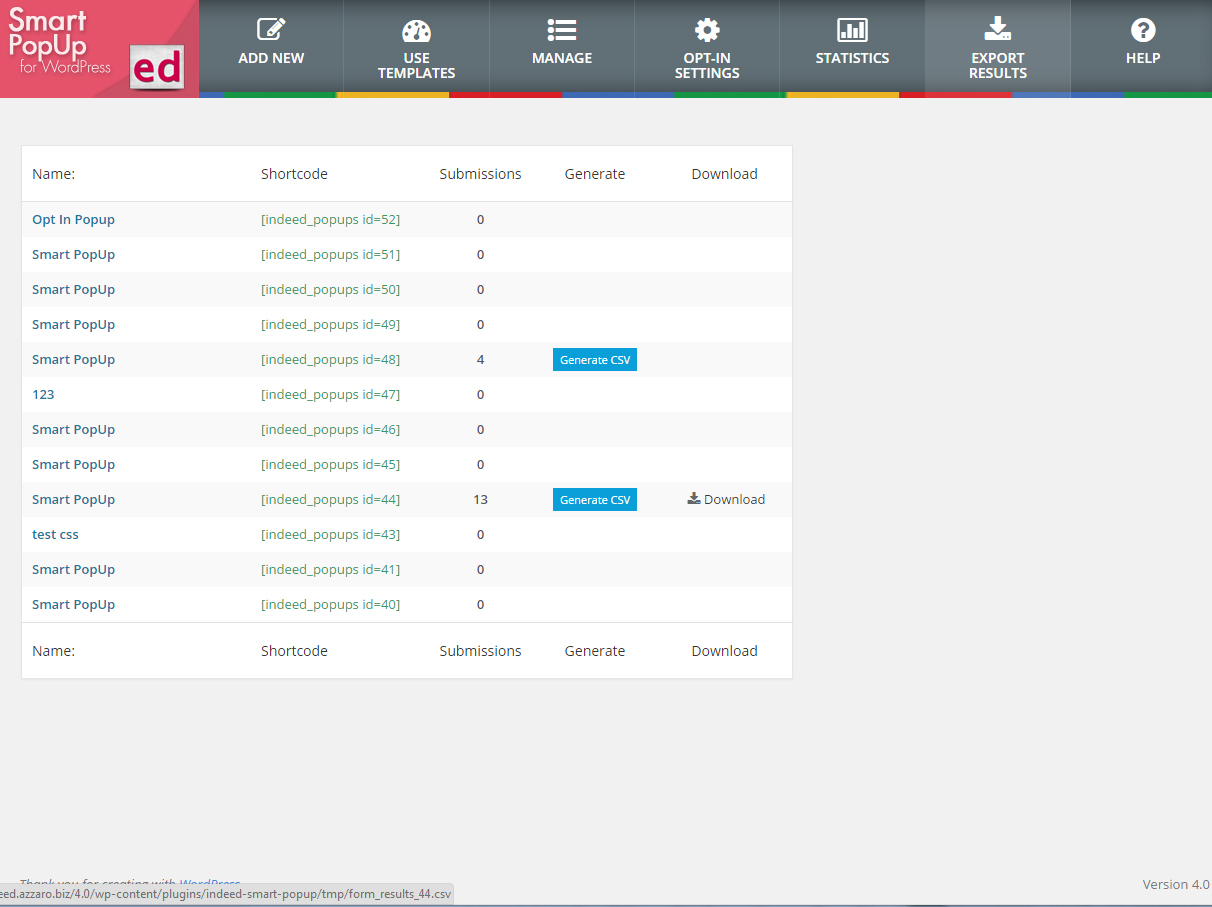
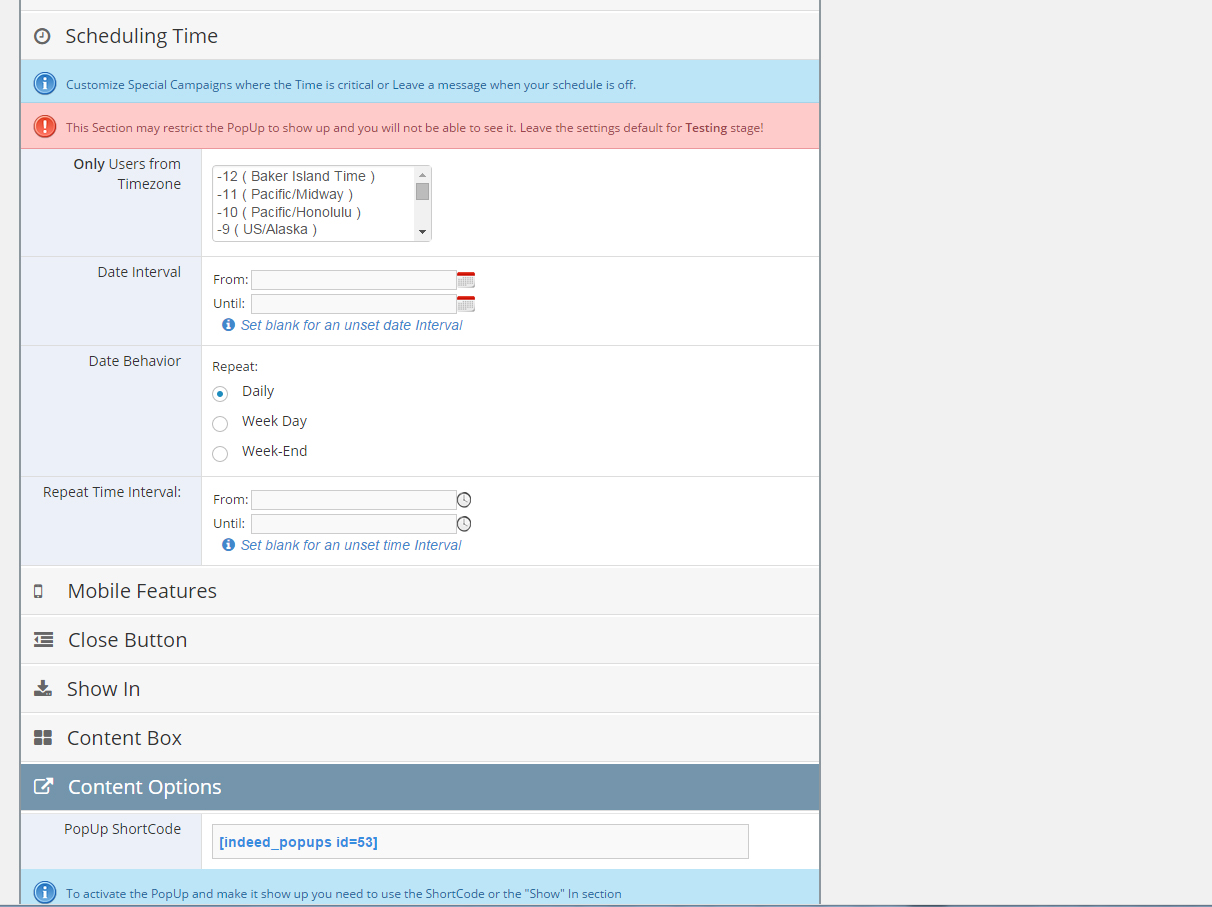
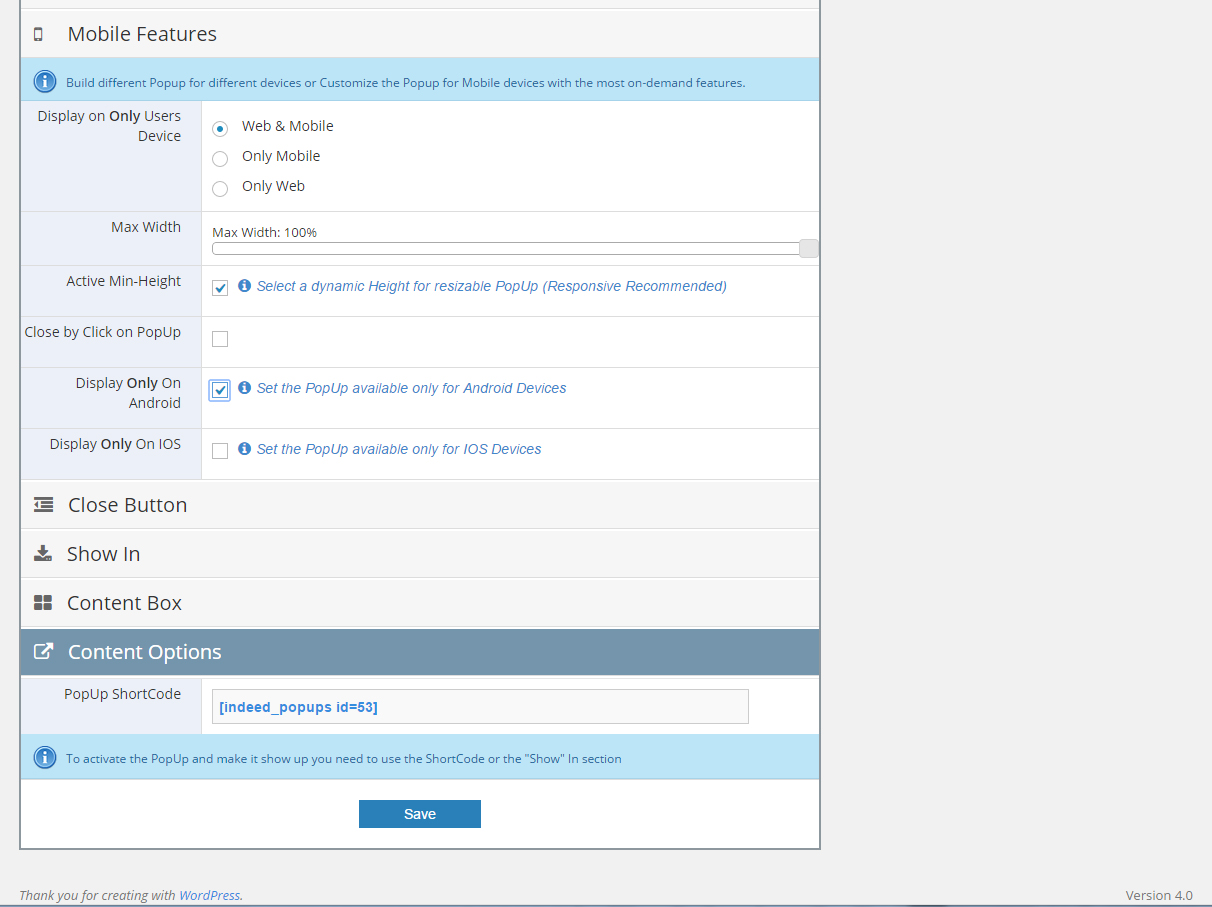
Smart Popup WordPress Plugin - Documentation

Item Support

Thank you for purchasing our plugin. If you have any questions that are beyond the scope of this help file, please visit the support system here. Thanks so much!

Documentation Folder

This is the folder containing this documentation that you are now viewing. No Need to upload it, just keep handy for when you need to refer back to.

indeed-smart-popup.zip

This is your Wordpress plugin file for Smart Popup Plugin that you add to your plugins directory of Wordpress.

Uploading Plugin

Inside your Wordpress admin area, go to Plugins at the top you'll see "Add New" click that and the click the link that says "Upload". In the upload box select the indeed-smart-popup.zip file and click upload.

After uploading is completed and installation is done Plugins > Installed Plugins and activate it.


Activate the Plugin

Go to Plugins > Installed Plugins click the "Activate" link under Indeed Smart Popup. Your Plugin is now installed!

General Options

The section is used to manage the position, dimension and the wrapper background.


Position Wrapper

Wrapper is the entire box that include the Popup it self

  • Absolute - the popup will stay on his absolute position no metter if the user scroll the page.
  • Fixed - the popup position it will be the same and will stay on screen even if the user scroll the page

Position Popup

Inside the Wrapper the popup can have different positions set on a specific side, or center.


Managing the two Positions the Popup can be set in any position and size. The above two settings are correlated.


Dimension

The Popup dimension can be set in a specific Pixels size or with a relative dimension based on the window screen using Percentage.

Background

It represent the Wrapper background that is actually cover the entire website behind the Popup.

A different opacity, a background image or to Disable the entire background are possible.


Event Handler

This section manage how and when the Popup is shows up.

10 different way to show up the Popup are available


Open Effect

20 jQuery effects are available to show up the Popup.

Some special effects may not be supported on different browsers or may affect the Popup Content. Be sure that are made proper test to validate this compatibility.

Duration

Is handle the Duration of open Effect. Need to be set in milliseconds. A longer or shorter Duration may affect the Effect look.

Open Event

When the Popup is shows up it can be set from this sub-section.

  • On Load Page - the Popup will show up automatically when the page is loaded.
  • On Close/Leave Page - the Popup will show up when the Page is Closed/Refreshed or changed. The action is provided by an alert JS action that ask the visitor if he really wanna do this action or not. A custom message can be set into the JS popup action also. If the user really confirm the action into JS popup will not be able to see the Popup. If will cancel the action the Popup will show up. Is the only option that can be done to turn around the visitor.
  • Try to Leave the Page - the Popup will show up when the visitor will try to leave the page. This action working by mouse tracking and when the mouse is moved out of the website to the top brwoser buttons (to close/change the page) the Popup will show up.
  • Scroll - the Popup will show up after the Scroll browser is moved and will arrive into the desired Scroll Position:Tob/Bottom. If the visitor will not move the scroll at all or will not arrive on the set Position the Popup will not show up.
  • Custom - the Popup will show up after a certain action is made: Click/Hover.
    The action should be done by a trigger that is present on the page. The trigger can be any HTML element that is already into the page.
    The trigger can be defined by a Class or ID name.

    Some Examples:


    Example (1) having an image that open the popup by Click action:
    The HTML content from the WP Page Content:
    <img src="...." id="trigger" />
    [indeed_popups id=1]

    The Popup "Event Handler" - Custom settings for the Popup ID = 1 are:
    Target by: ID
    Target Name:trigger
    Event:Click

    Example (2) having a text that open the popup by Hover action:
    The HTML content from the WP Page Content:
    <button class="click-here" />
    [indeed_popups id=1]

    The Popup "Event Handler" - Custom settings for the Popup ID = 1 are:
    Target by: Class
    Target Name:click-here
    Event:Mouse Over

    Important:
    id=1 is just representative. You need to set your proper Popup ID.


    Important:
    a Link html element may not work with a "Click" evennt 'cause the link action will be loaded before the popup will show up.

Close Effect

26 jQuery effects are available to show up the Popup.

Duration

Is handle the Duration of close Effect. Need to be set in milliseconds. A longer or shorter Duration may affect the Effect look.

Delay

The Popup show up may be delayed with a specific no. of seconds

Duration

The Popup can be automatically closed after a specific no. of seconds.


"Custom" Event - onClick how should look into the Page Content


"Custom" Event - onClick how should look into Popup Settings


Smart Targeting Display

On this section you can select your audience or to restrict the Popup show up for certain conditions.

Important: This section may provide to restrict the popup show up in your case also. Use it carefully especially into the testing stage!


Only Unregistered User

It will show the Popup Only for unRegistered users. If is unselected the popup will NOT show up for unregistered users

Only Registered User

It will show the Popup Only for Registered users. If is unselected the popup will NOT show up for registered users

First Time Visit

Activating this option the Popup will show up just ONCE

The restriction can be managed using the option: "Reset 'First Time Visit' After:"

This feature works like a tipally Long Term Session.

Has Commented

It this feature is activated will show the Popup Only for users that Has Commented already.

No Commented yet

It this feature is activated will show the Popup Only for users that doesn't Commented yet.

Visits Only From Specific Search Engines

This section will restrict the popup to show up Only for users who come from the selected Search Engines

The feature works based on "ref" tracking. It required to be active on the website.

Visits Only From Specific Ref

This section will restrict the popup to show up Only for users who come from the desired websites

Add each website on each line, without "http://" or "https://".

The feature works based on "ref" tracking. It required to be active on the website.

Max Show On Session

This section will set the popup to show up to a limited nomber of shows.

Setting to 1, the popup will show up just once

This restrictive condition it will be automatically reset after a certain time set with the option:"Session Time"

This feature works like a Short Term Session

Display On Every X Visited Pages

This section set the plugin to show up on every a certain number of pages visited by the user.

If the Popup is active on all over the website, and the option is set with value: 2. The Popup will be show up only on odds pages: on the first visited page, on the third visited page, on the fifth visited page and so on

The value:1 means the popup will show up on every page.

Display After X Visited Pages

This section will restrict the Popup to show up after a certain number of visited pages.

If is the value is: 2, the popup will show up on the second visited page.

Using the default value:1, the Popup will show up starting with the first visited page.

"Don't Show Again"

Is a very helpful feature that can provide to visitors the option to makes the plugin to don't show up again (this is available durring the Short Term Session).

The Code should be copied as it is and added on the HTML element that should act like that.

Example: <span onClick="dontShow(53);" > Dont show the Popup </span> - setting this into your Popup Content, when that text is clicked, the Popup will no show up again until the User Session will expire


"Don't Show Again" - how should look into the Popup Content.


Scheduling Time

On this section you can select your audience based on TimeZone or to restrict the Popup show up on a certain time.

Important: This section may provide to restrict the popup show up in your case also. Use it carefully especially into the testing stage!


Only Users from Timezone

This section restrict the Popup to show up just for users from a specific TimeZone.

This feature is based time provided by the User Browser. Some users may change their Time.

Date Interval

The Popup will show up for a certain Date Interval. Leave blank for an unset condition.

Date Behavior

The Popup will show up for a specific type of the day. The Default value is: Daily.

Repeat Time Interval

The Popup will show up for a certain Time of Day Interval. Leave blank for an unset condition.


Mobile Features

This section provide additional feature for a better Mobile integration.


Display on Only Users Device

This section may restrict the Popup for a certain type of the device. So, can be built different popups with special design for different devices.

Max Width

The Popup may adapt his width up to the entire screen width or only part of it. 100% - means that the popup will use the entire width of the screen device.

"Max Width" is related to the screen device width.

Close by Click on PopUp

For mobile devices the Popup may be set to be closed by clicking on the entire Popup and not just using the Close button. This feature should not be active for Popups that request additional action and clicks on it.

Display Only On Android

This section will restrict the Popup to show up Only on Android devices

Display Only On iOS

This section will restrict the Popup to show up Only on iOS devices


The devices are tracked and identified by a complex script based on official data. May not be able to identify some unknown mobile devices.


Close Button

This section managed how can be closed the Popup.

Some predefined close buttons are available.


Disable Close Button

The Close Button can be disabled at all so the users will not be able to close the popup without a certain action. This feature is dedicated especially for "Locker" Popups.

Position

The Close Button position can be managed starting from one of the Popup corner. The position values can be set with negative values to display the Close Button outside of the Popup Box

Disable Escape (Esc) Key

Some browsers provides the option to close a Popup using the "Esc" key. This option can be disabled by selecting this setting.This feature is dedicated especially for "Locker" Popups.

Disable Click Out

Some browsers provides the option to close a Popup by clicking out of the plugin. This option can be disabled by selecting this setting.

Important: This option is mandatory to be active when on the same page are shows up multiple Popups with close Button. By closing a Popup may represent a "Click Out" for other popups and may close undesired Popups.

Loker Code

This feature may replace the Close Button action. Is very useful for "Locker" popup, so can be set on the "Submit" button and the user will not be able close the Popup without using the "Submit" button.

The Code should be copied as it is and added on the HTML element that should act like that.

Example: <img src="...." onClick="locker(53);" /> - setting this into your Popup Content, the popup will be closed only if the user clicks on that image.


Show In

This section is an alternative PopUp "Activation" to the inserting the shortcode info specific pages

Is desirable for Popups that should show up on multiple pages or for a specific Page Types.


Important: The section was built to cover most of the custom WP themes structures. For WP structures that were changed signifier the section may not be able to show the Popup. The Shortcode should be used.

Important: The "Except" list is used to exclude some Pages/Posts to not show the Popup. Don't check any items inside it only if you don't wanna display the Popup on those pages/items.


For special situations can be used to handle the Popup Show Up based on "Templates".


Content Box

This Section provide the option to customize the Popup Box style.


A Background Color or/and Image can be set.

Box Border can be also managed by Color, size and the Rounded corners (border radius).


Content Options

On this section you decide which type and what content do you wanna set into your custom Popup.

Now, are available 10 Predefined Categories that should cover all the particular desires
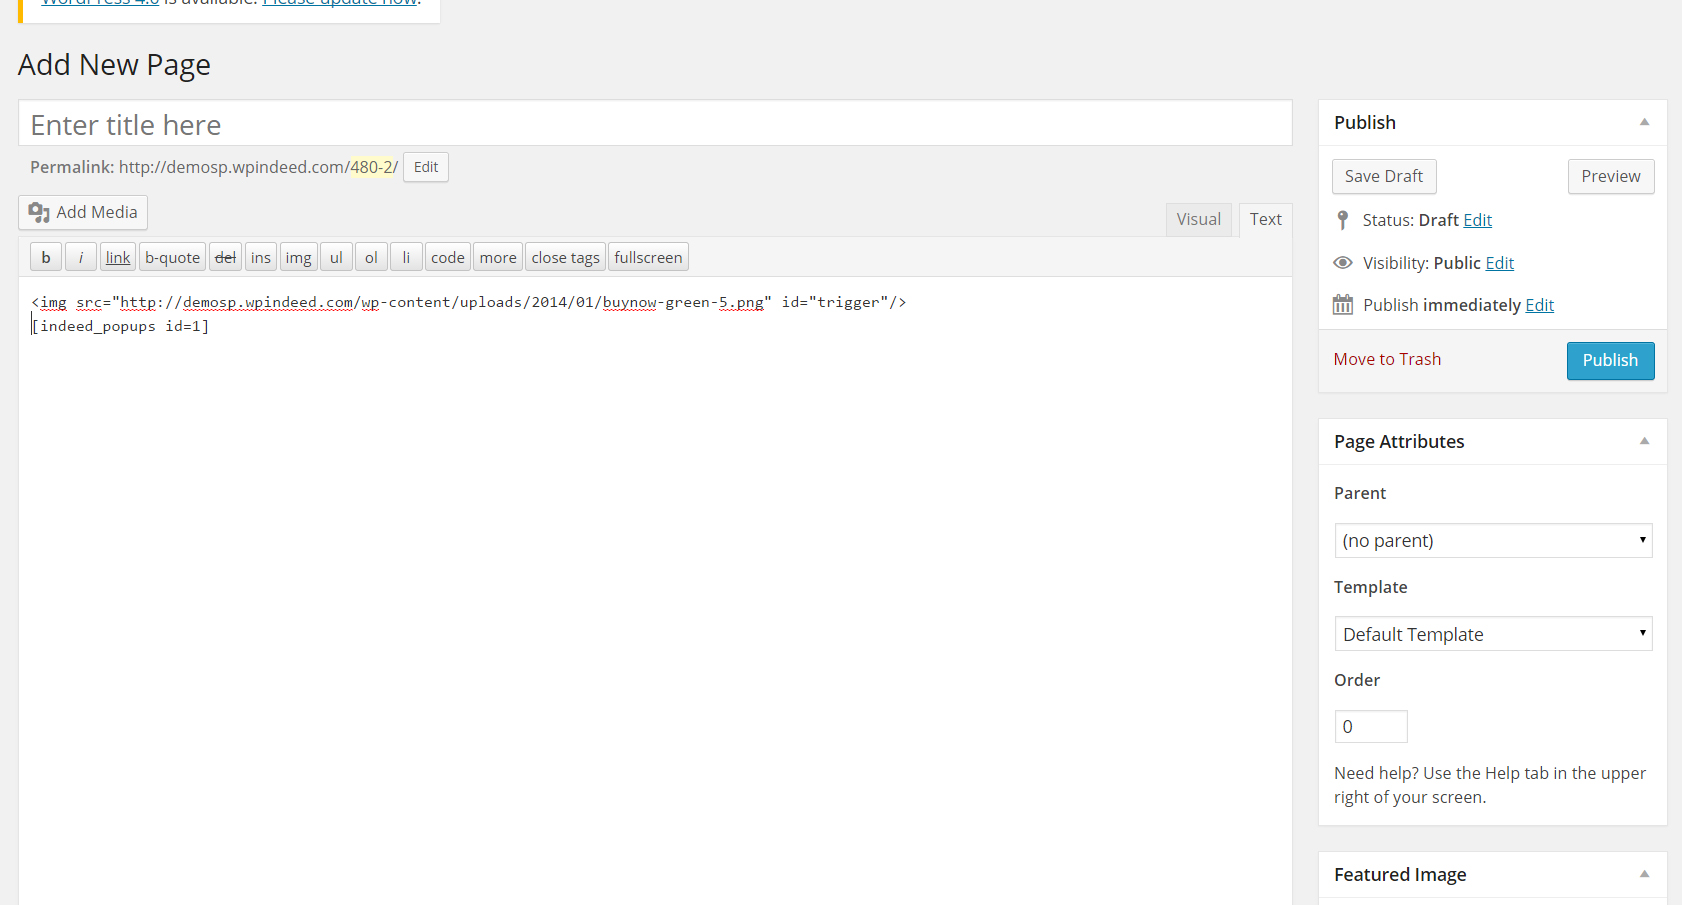


HTML

Help you to add any type of HTML content into your Popup.

This features it cames with the most used HTML Editor, CKEditor in full version.

The HTML Content can be built directly into this editor or copied from outside. The CKEditor provides the most used options.

Besides the regular options, for special situations can be used:

  • Source button - use this option to add or manage the HTML source code directly.
  • Google Maps button - use this option to add a simple Google Map
  • YouTube button - use this option to add a simple YouTube Video
  • Form Builder section - use this section to build and create Forms with the main fields

The right-click feature to access the main settings is available, also.


Some Shortcodes may be add on this section but some of them may require additional JS elements. For those cases, use the "ShortCode" option.

The HTML Content may not look exactly as will show on the front-end side
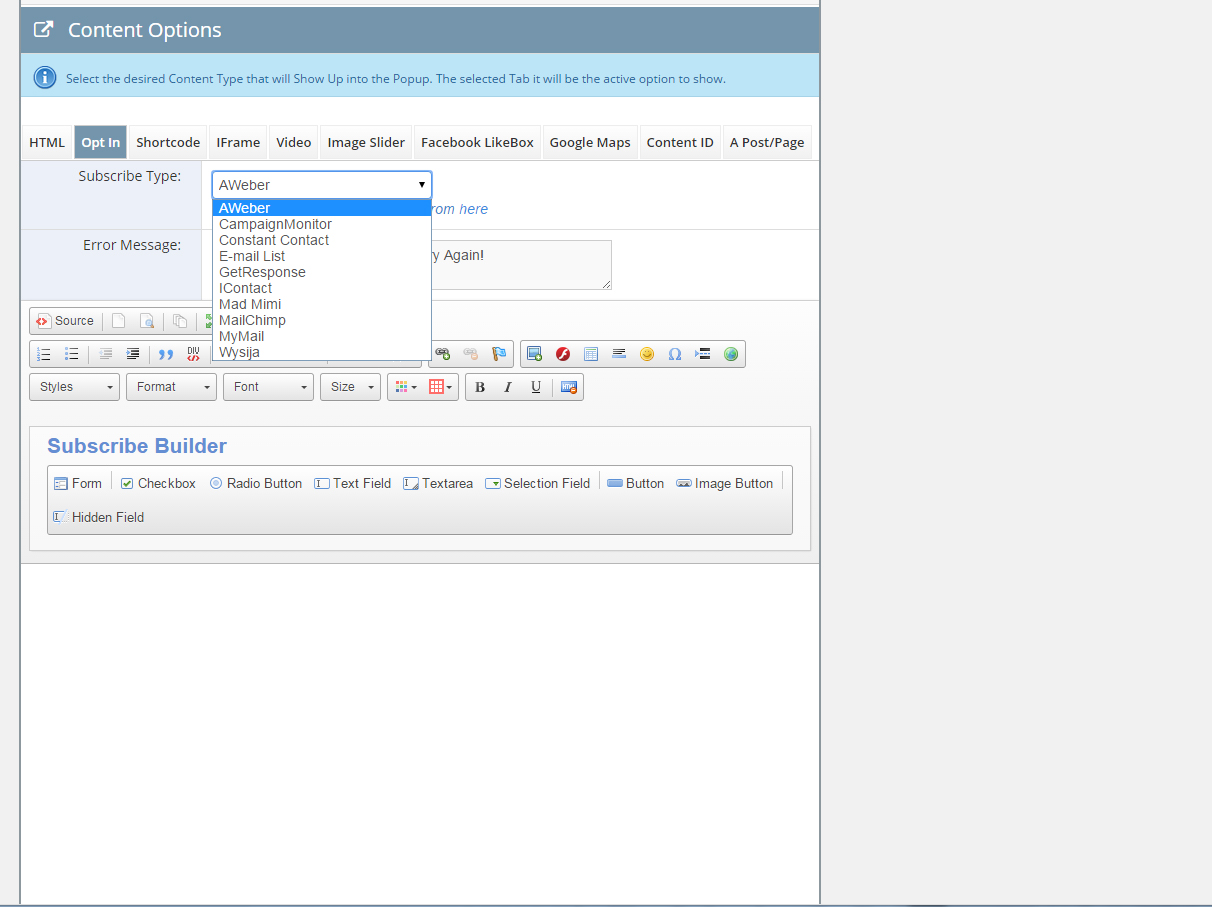
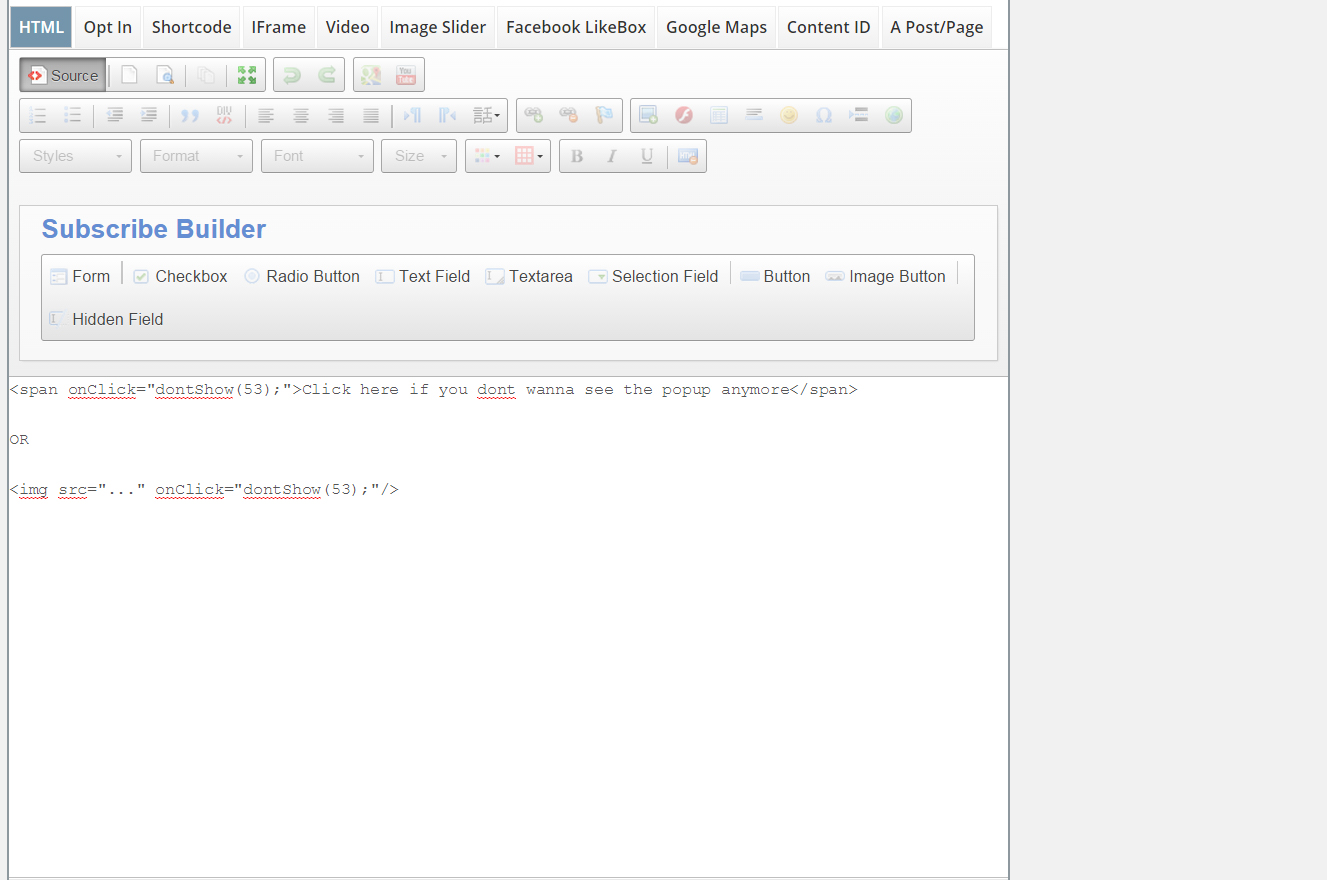


Opt-In

Help you to add and manage an OptIn Popup build for subscription.


Select the "Subscribe Type" to decide which special Email Marketing Platform should interact with the OptIn Popup.

"Error Message" is the message that will show up if the form is not completed properly.


For a proper Opt-In form use the main particular feature:

  • Source button - use this option to add or manage the HTML source code directly.
  • Form Builder section - use this section to build and create Forms with the main fields

To build a custom form you need to:

  • Add a "Form" object setting just the name of the Form
  • Add form fields and objects inside the form object (red lines)
  • To add an Email filed, add a "Text Field" object, choose the type to: "Email" and add the name of the field: "email"
  • Add a "Button" object with Type: "Submit".


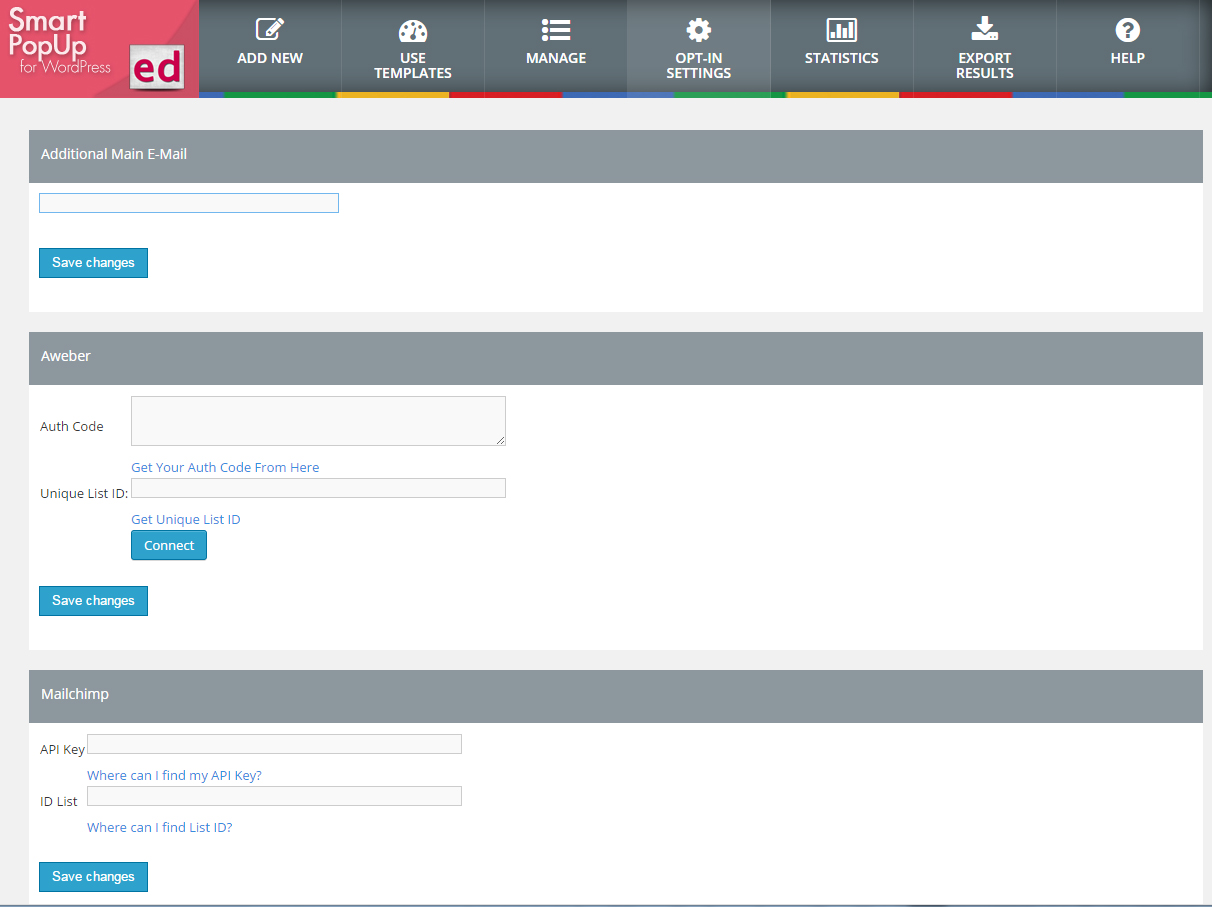
Important: Be sure that you have the Email Marketing properly set from "Opt-In Settings"
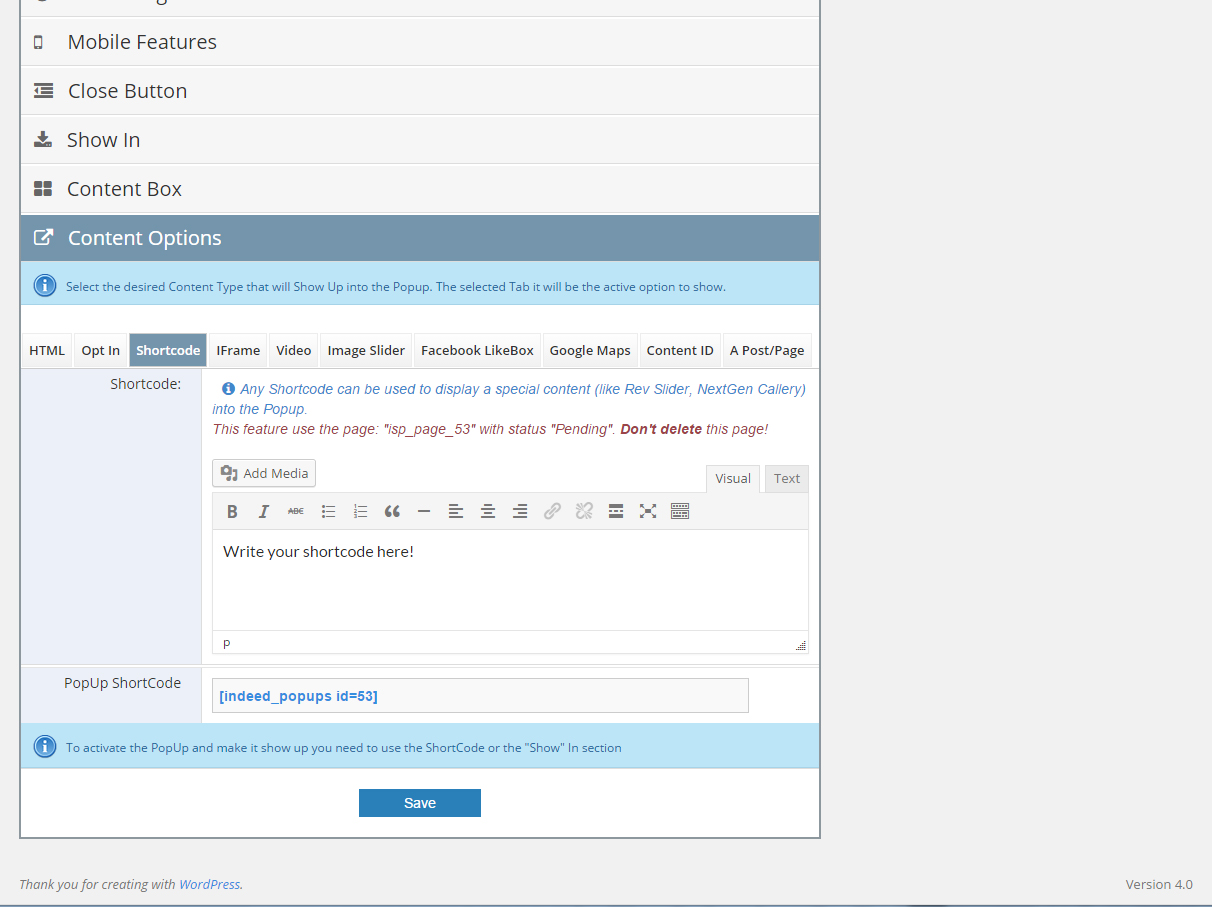


ShortCode

This section help you to add any ShortCode to be show up as a Popup.

This feature is possible only using an additional trick, a Pending Page dedicated for this feature. A page with status "Pending" and Title "isp_page_XX" it will be created. Don't Delete this page!


IFrame

Any page, even an external one can be added to show into the Popup. Be sure that you set the properly Popup Size for a perfect show up.
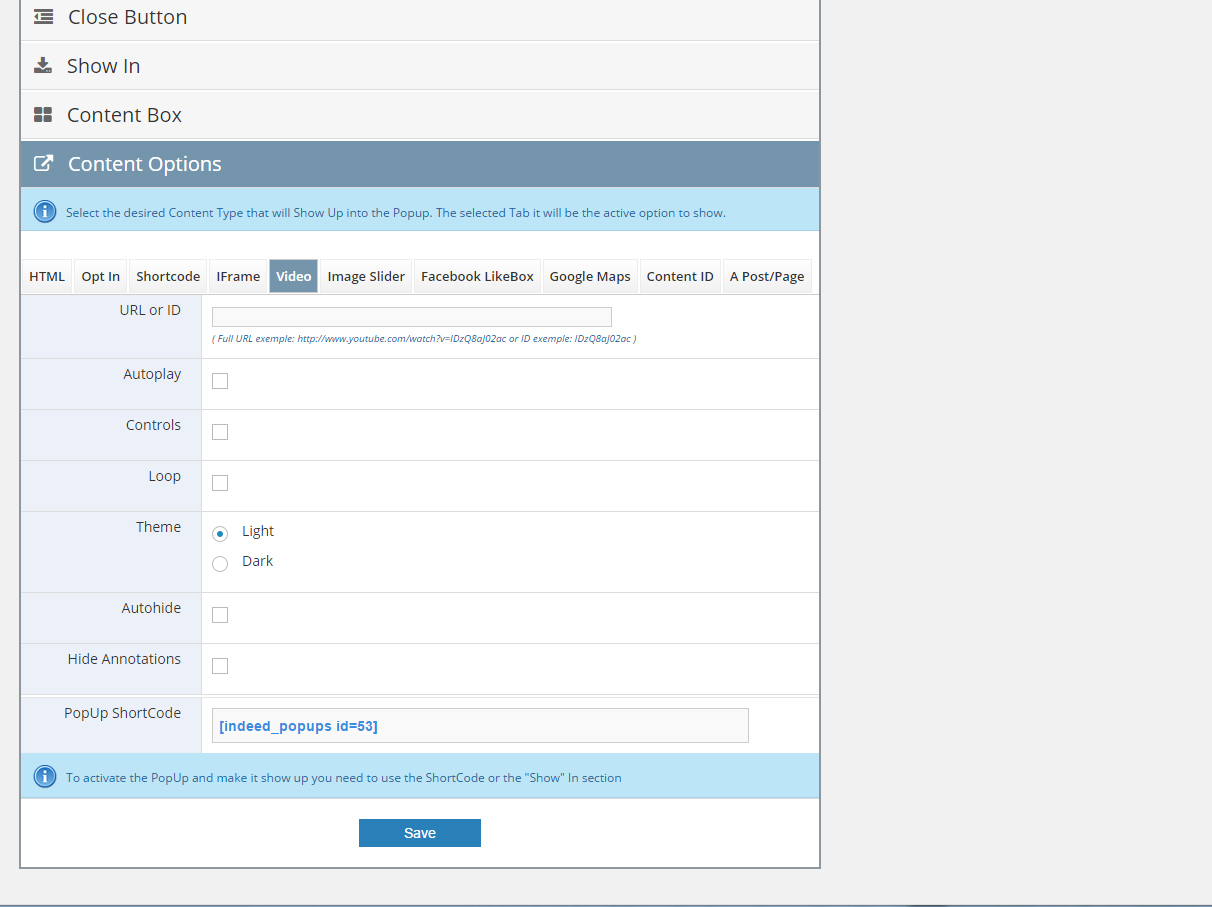


Video

A YouTube Video can be add to show up as a Popup. Just add the URL or Video ID and play with additional features to fits with your desires.
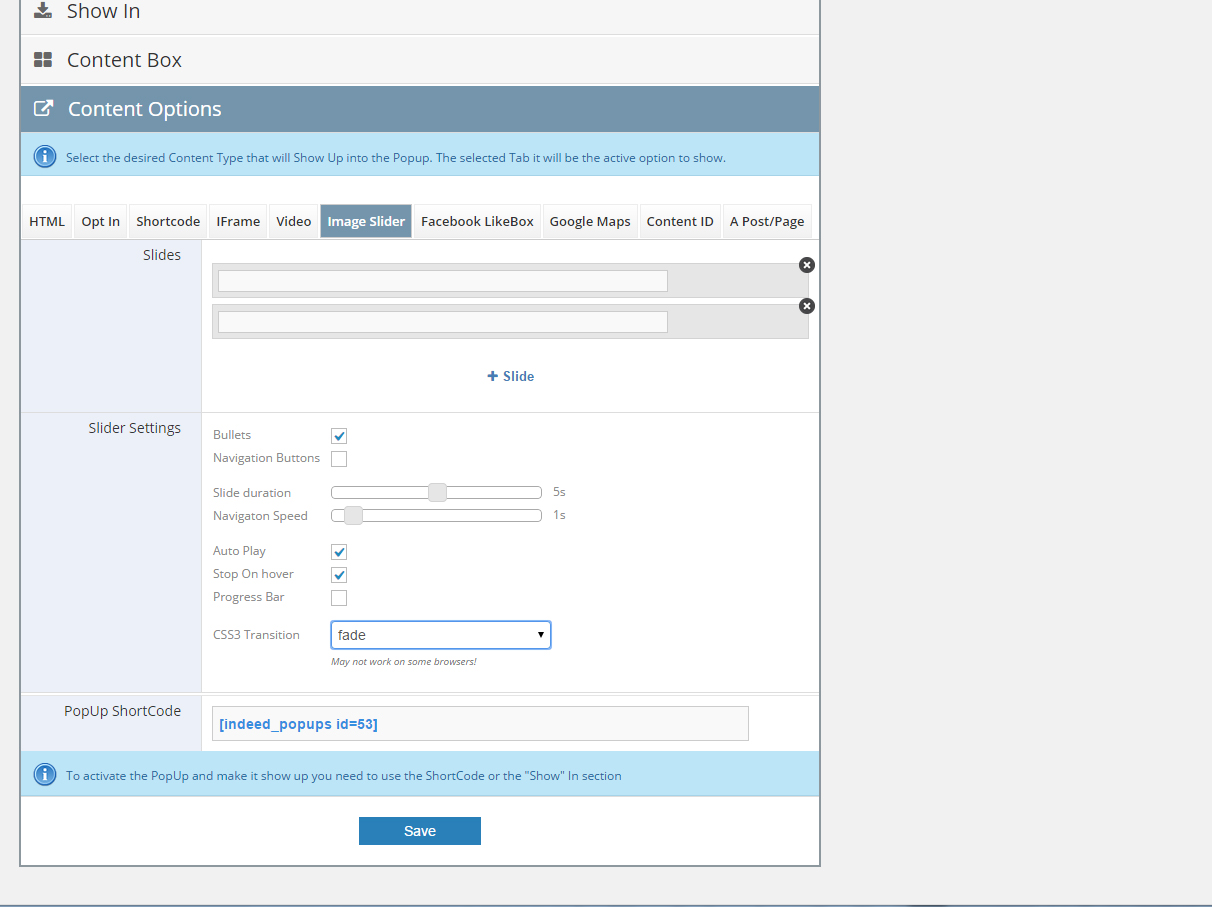


Image Slider

You can build your Custom Slider with multiple features.

The most main options can be set to provide the right sliders.


"+Slide" - button to add Slides into the Slider.

The "CSS3 Transition" may not work on additional or old browsers.
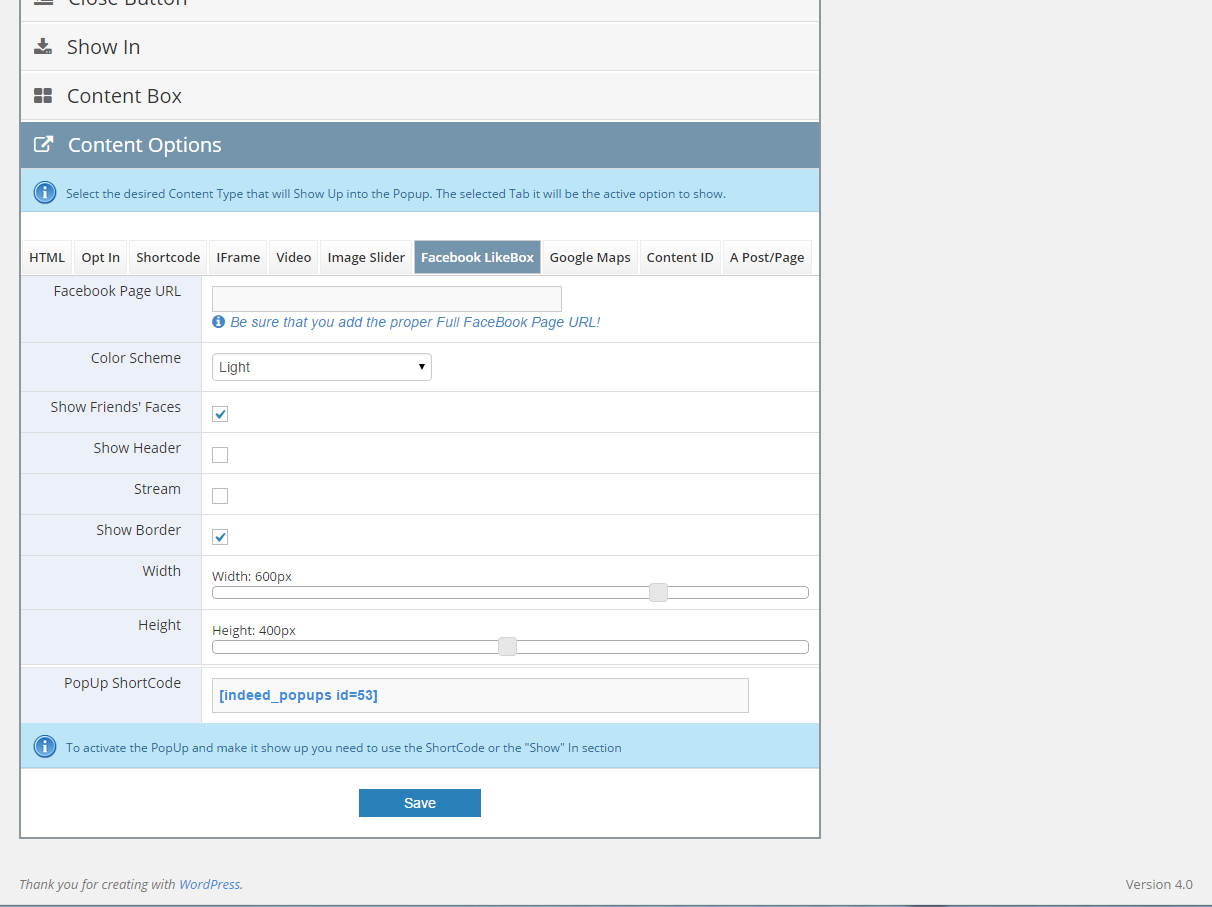


FaceBook LikeBox

Add a Facebook Likebox can be added to improve the interaction on your website with Social Media.

To cover the entire Popup box, be sure that the LikeBox has the same Dimension as Popup.


Important: Because the LikeBox is showing up based on some JS scripts accessed directly from FaceBook that are loads when the Page is loaded, the LikeBox may not showing properly with some "Open Effects" from "Event Handler" section.

Important:The LikeBox make not work properly if other JS scripts from FaceBook are loaded on the same page.
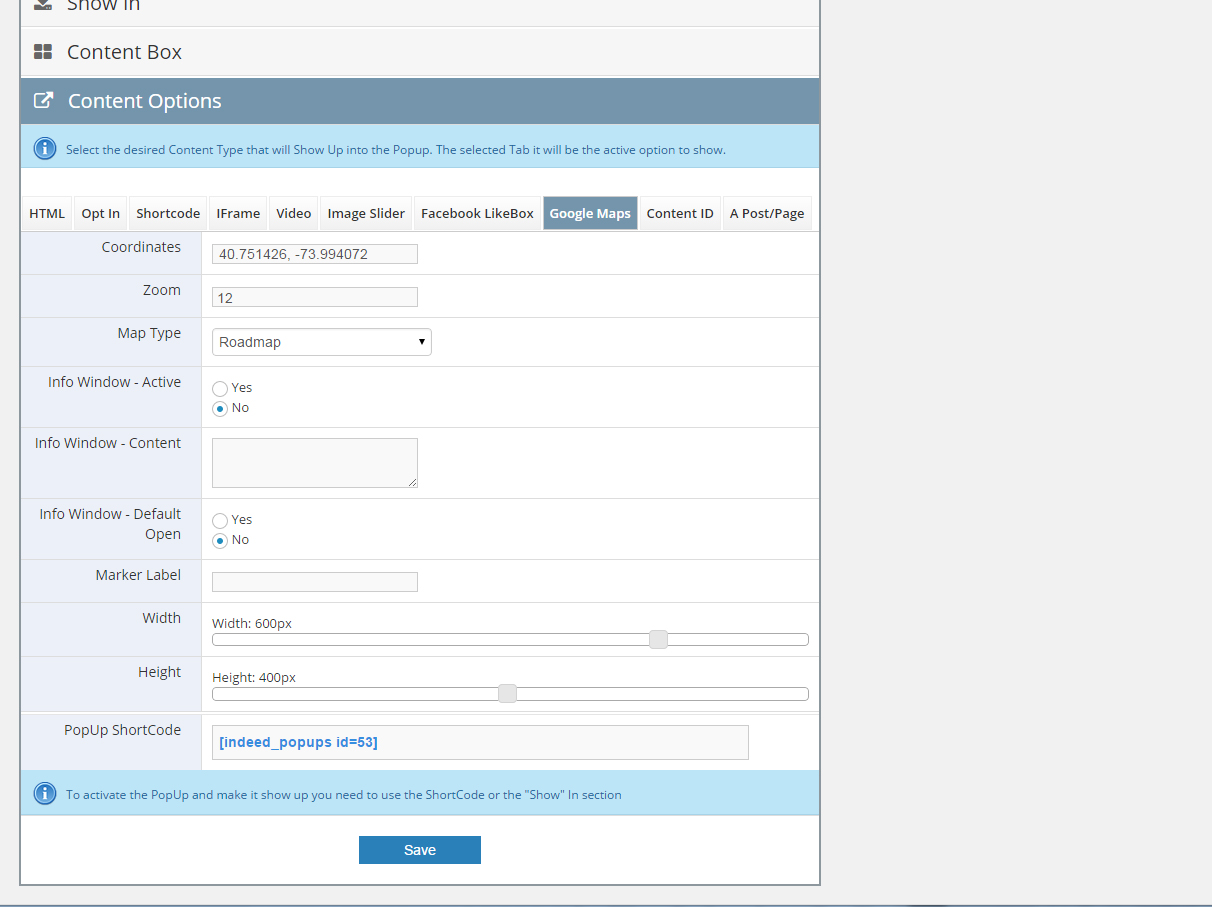


Google Maps

On this section hel you to add a full Google Map into the Popup

"Coordinates" - can be get from maps.google.com by clicking on a desired location.

Many other additional features may be set, like Maker Label and so on.
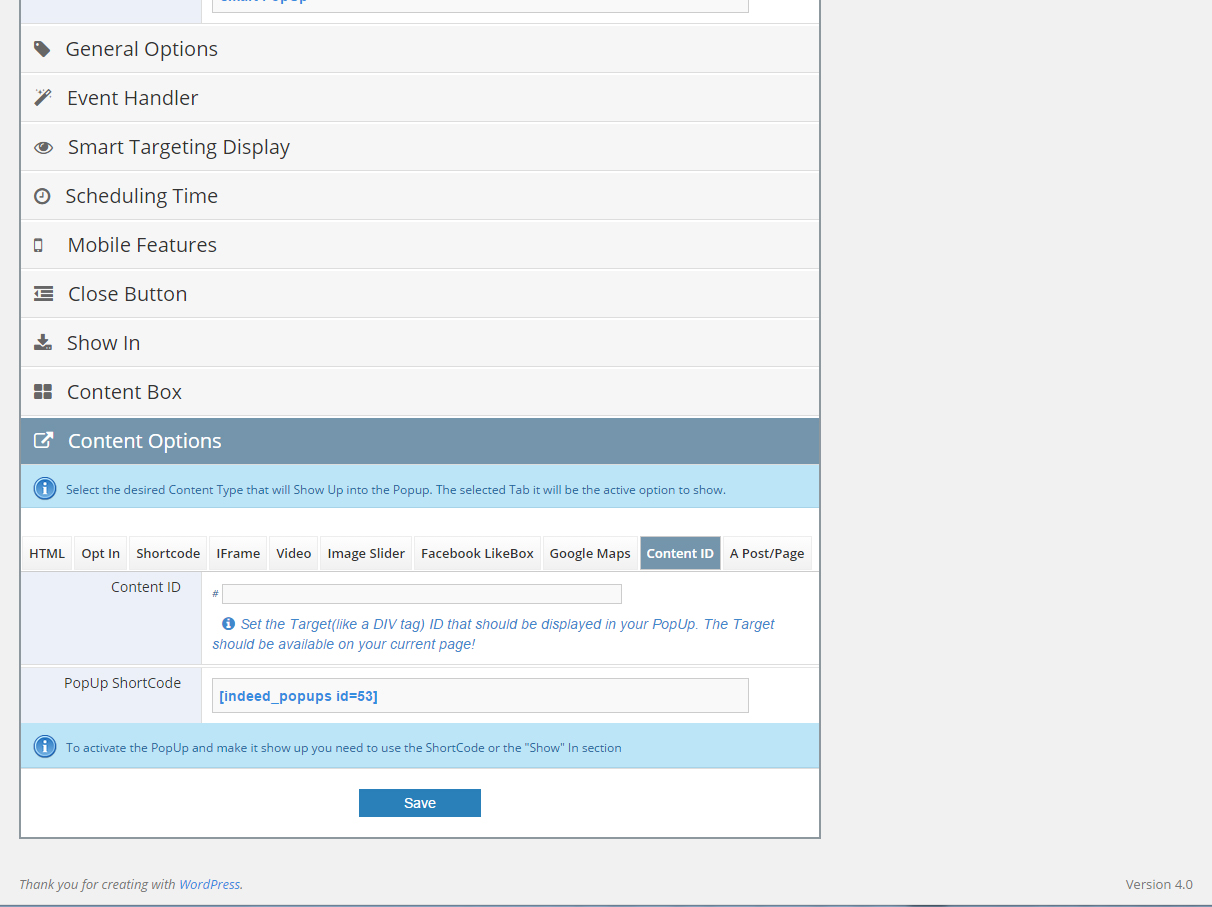


Content ID

This Option can be used very well to show into the Popup any content from the current page, directly into the Popup. This feature can be understand as a "zoom" feature.


Important: - the content is localized by an ID set on the tab that contain the desired content. Be sure that the content ID is set into the current page.
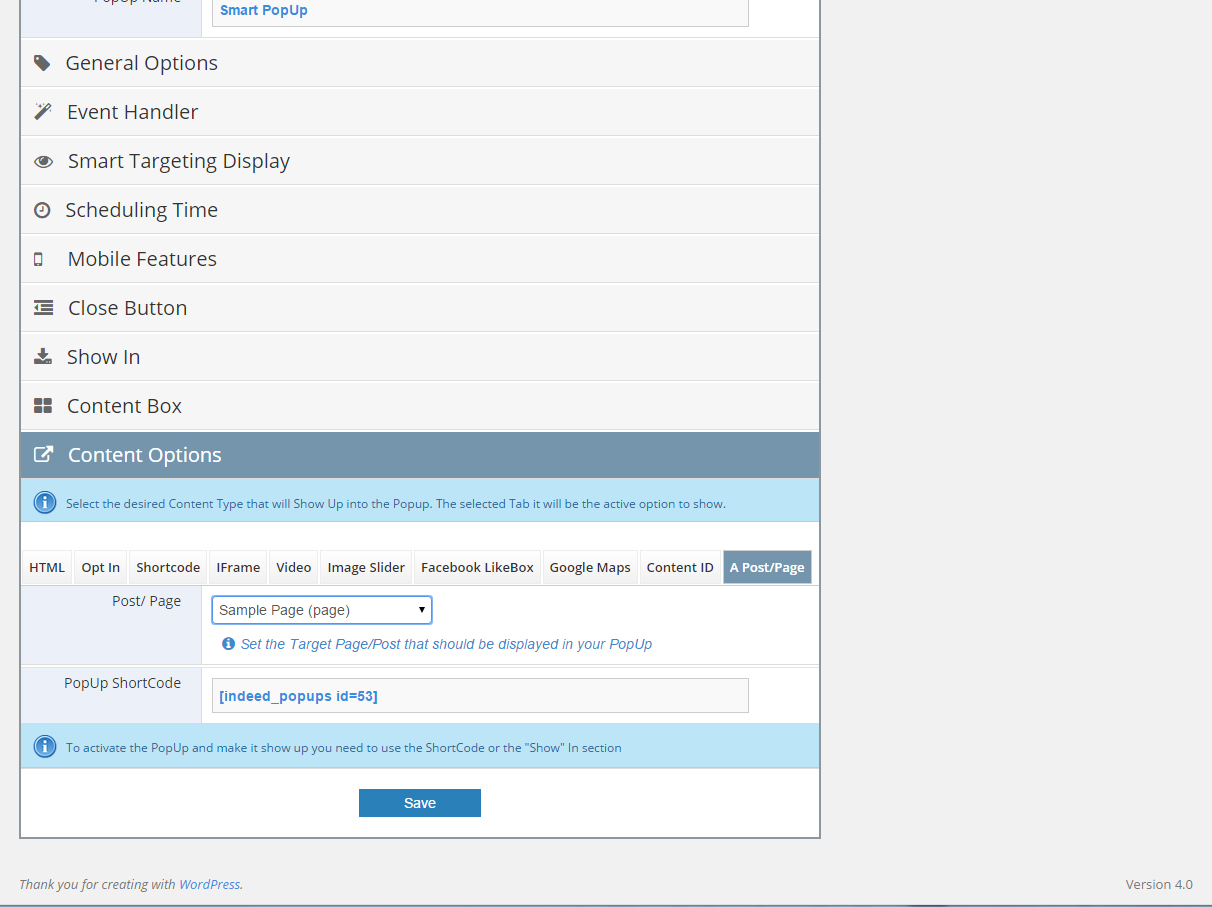


A Post/Page

Automatically can be set any page/Post from your WP to show up on Popup.

Be sure that you add the proper Popup Dimension.


Manage

The Popup Manage Table provide all the necessary details about all your Popup.

The Popups can be Deleted by bulk or one by one.


Columns

  • Name - name of the Popup
  • ShortCode - the Popup Shortcode
  • Visits - no. of views
  • Visitors - no. of unique visitors
  • Device - on which device the Popup is activated to show up
  • Active - The Popup Status that can be changed by one click. Any Popup can be "paused" for a while without any other change inside the Popup. By default, the Popup is "active"
  • Preview - a Popup Preview will show up, unless the Popup has some special restrictions or Open Events
  • Edit - Edit button
  • Duplicate - the Popup can be duplicated including all the features
  • Delete - the Popup can be deleted

Opt-in Settings

Important: be sure that you set the credentials for your desired Email Marketing Platform before is set to be used!

By default, the "Saved Email List" option is provided. All the submissions emails will be saved into that TextArea and can be copied from there.

For each Email Marketing Platform the necessary links to get the credentials are provided on his tab. Follow those links and instructions to get the proper settings. Be sure that the data is copy-paste properly and your Email List is not restricted by any rule.


An Inform Email is send after each submission. By default, is used the WP Email Address set in Settings-> General. An alternative Email can be set into "Additional Main E-Mail" tab


Wysija Contact & MyMail are available only if those Plugins are installed and active.


Statistics

Some data may not be registered if the users use special devices or their IP is unknown for GeoLocation feature.


Export Results

Inside this page you can track the total no of results from each Popup.


For Popups with at least one result, the "Generate CSV" button will appear. Click on that button and the Popup will prepare the CSV file for download. Once the file is ready, the "Download" link will appear into the last column.


Thanks again for buying this plugin, if you need any help/support at all contact us.


Item Support