illusion - Premium Multipurpose
Magento Template
- created: 12/18/2014
- by: Mad_velikorodnov
- themeforest.net/user/mad_velikorodnov/portfolio
Thank you for having purchased illusion - Premium Multipurpose Magento Template. Now it's time to get your fingers a little dirty and start configurate your theme. If you have any questions that are beyond the scope of this help file, please feel free to contact us via Ticksy http://velikorodnov.ticksy.com Thanks so much!
1. FAQ & Quick support
-
Help & support
-
Theme support
Please read this user guide carefully, it will help you eliminate most of potential problems with incorrect configuration of the theme and Magento.
-
Magento support
Magento configuration, installation, maintenance, customization etc. is beyond the scope of our support. But since Magento is very popular platform you can find tons of useful tutorials and articles on the web.
-
Important things
-
Disable Magento Cache
When installing the theme, you should completely disable and clear the cache. To access cache management screen go to: System > Cache Management
After installing it you can enable it again.
-
Media folder
Check if media folder is writable on your server. Please set permission 775 or 777 for media folder.
-
Reindex Magento
After making changes on your store, such as editing product, changing product attributes etc. you should reindex the data . To access the index management screen go to: System > Index Management. To rebuild your indexes, select all, select Reindex Data and click Submit.
-
3rd-party Extensions. Extensions Support
Unfortunately we do not support 3rd-party extensions.Our theme (and any other custom theme) isn't compatible with all third-party extensions by default. You often (not always) need to customize the extension to make it work properly with your theme. It's impossible for theme author to make the theme compatible with all existing extensions. Only default Magento theme is compatible with all third-party extensions, because all extensions are designed to work with default Magento theme.
Mos common case is a conflict if the extension and the theme override the same Magento template file. In such cases you need to customize conflict template and merge extension into theme template
-
Installation & configuration
Before start
Backup
Backup store files and the store database.
Disable compilation mode in System > Tools > Compilation.
disable Magento cache - Cache Management
Log out from magento admin panel ( if you logged in ). This step is required to reset
magento access control cache
Quick start package
Do not install quick start package on live site
Quick start package already contain all magento files. Do not use it for live site.
1. Create new database and import database sample ( \illusion_quick_start\illusion_quick_start.sql) in
athlete_quick_start folder.
2. Extract and Upload the www folder of Quickstart package to your server ( magento
root folder )
3. Open a browser and navigate to your site (where the quickstart uploaded) to load
default Magento installer with the database you have just created and import the
database sample.
4. Follow the installation instructions step by step
-
System requirements
Illusion theme supports Magento Community Edition 1.6.x.x, 1.7.x.x, 1.8.x.x, and 1.9.x.x. All magento versions can be downloaded from here: http://www.magentocommerce.com/download
It does not support Magento Enterprise Edition as well as Magento GO.
-
Configuration of Illusion theme
-
Before you start the installation process, it is recommended to backup your Magento installation and database.
-
After that, unzip downloaded folder ‘illussion’, then upload and copy all files and folders to your Magento root directory.
-
Open CMS > Pages. Open page with URL Key ‘home’. In Design tab, set layout ‘Illusion Home Page’. With that you will set full width page, specially made for home page. Edit Content, on Content tab, if needed and click Save Page.
-
Setting Illusion Theme
-
Login to Magento Admin panel
-
Go to: System > Configuration and click on Design tab on the left menu.
-
Inside Package tab put ‘illusion’ into current package name.
-
Save the configuration by clicking on Save Config button.
-
Go to System > Cache Management and clear the cache.

2. Features
-
Theme Settings
Illusion theme comes with many handy tools. One of them is Magento extension called ‘Theme Settings’. It is using for setting the right configuration on may places.
-
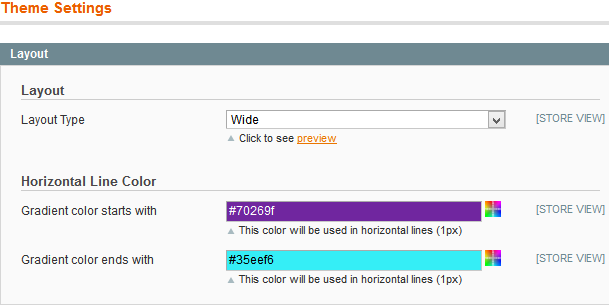
Layout
There are two types of layout, ‘Wide’ and ‘Boxed’. Each of them can be set as default layout using drop down. Below is link ‘preview’ which will open and preview image of how they actually look.
Also, there is configuration for horizontal line color, which is using for loader and as a divider in header.
-
Fonts
Here you can configure fonts.
Font Family can be set (Google Fonts and Custom Fonts). Google Font Family has option to set one of many Google Fonts. Both families has option for font size, font color, font weights, etc..

-
Custom CSS
Illusion has option for uploading your own custom css if there is need for that.
Open Illusion > Theme Settings > Custom Css
Just upload your css file, and it will be added to Illusion theme.
-
Header
-
There are three different headers. For each of theme there is link ‘preview’ which can be show how they actually looks.
-
Header background color can be set here
-
Header link colors can be set here as well

-
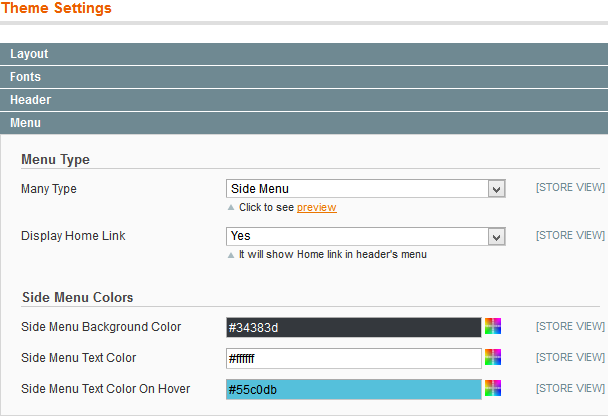
Menu
-
Two menu types are supported in Illusion theme ‘Side Menu’ and ‘Sticky Menu’
-
Showing homelink in from of the categories can be configured here
-
For each of the menus, there are settings that can be configured here, like colors for links for example
-
Footer
-
Footer has three types, which can be set here.

-
Social
Social tab contains configuration options for Facebook, Twitter and other social networks.
-
Product Box
Product Box has settings to enable or disable ‘ratings’, ‘categories’, ‘price’, ‘add to wishlist’ and ‘add to compare’ buttons on product details pages, product listing pages, product sliders, etc…

-
Price
Price colors can be set inside Price tab.

-
Add to Cart
Add to Cart button has option for setting different colors for different actions.

-
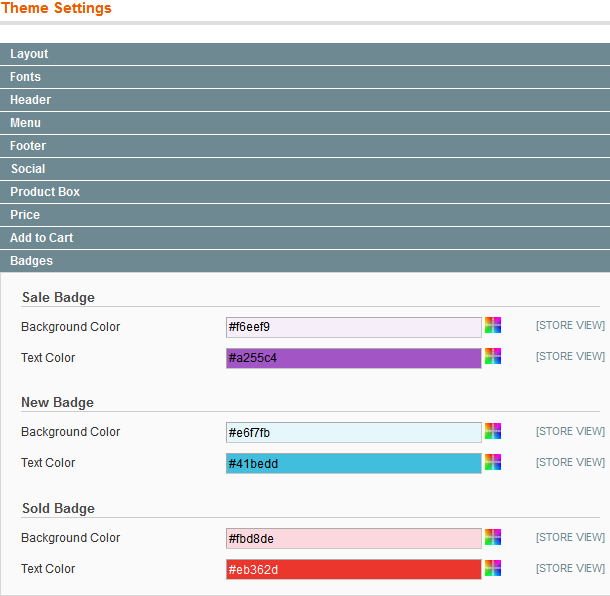
Badges
Badges like when product is on Sale, when product is New and also when is Sold, can be configured here.
-
Breadcrumb
Breadcrumbs can be shown or hidden, by setting the right value in this tab you can have them shown. By default breadcrumbs are shown. If you would like to disable them open Illusion > Theme Settings > Breadcrumb and set No as dropdown value.
-
Previous/Next
By default Illusion theme has on product details page, arrows for previous and next product. If you would like to disable it open Illusion > Theme Settings > Previous/Next and set No.
-
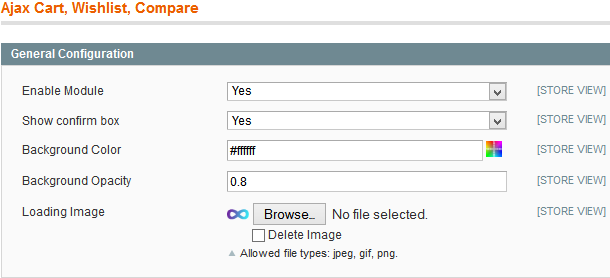
Ajax Cart, Wishlist, Compare
Illusion theme comes with ajax extension which allows to use modern technologies instead of old page reloading. Configuration can be found in
Illusion > Ajax Cart, Wishlist, Compare
-
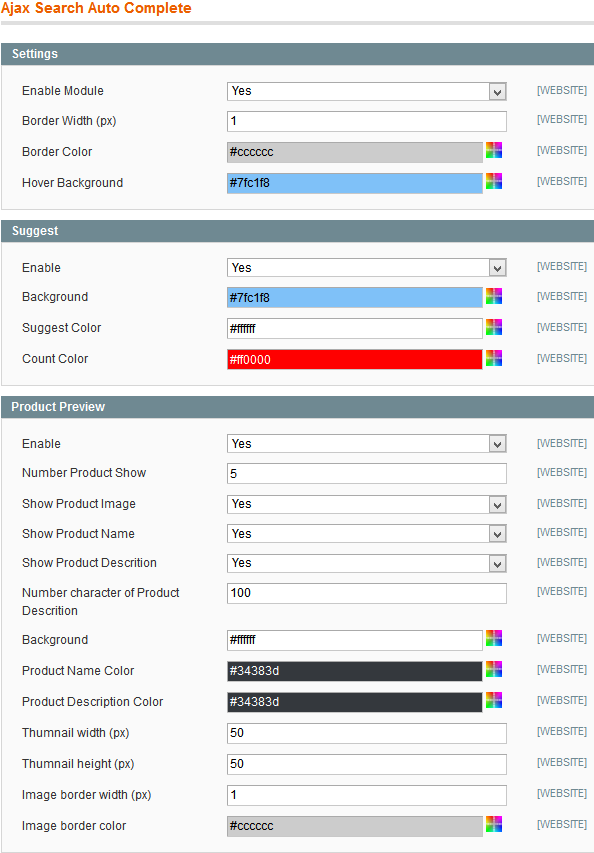
Ajax Search Auto Complete
Ajax Search Auto Complete is a handy tool which can be useful as a quick preview related to what you are searching for. Settings can be found on Illusion > Ajax Search Auto Complete.
-
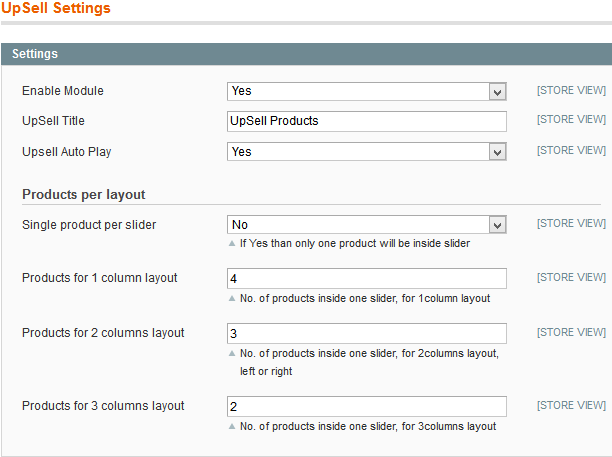
UpSell Settings
UpSell product settings can be found on Illusion > UpSell Settings.
-
CrossSell Settings
Settings for crosssell products which can be seen on shopping cart page, can be found on Illusion > CrossSell Settings.
-
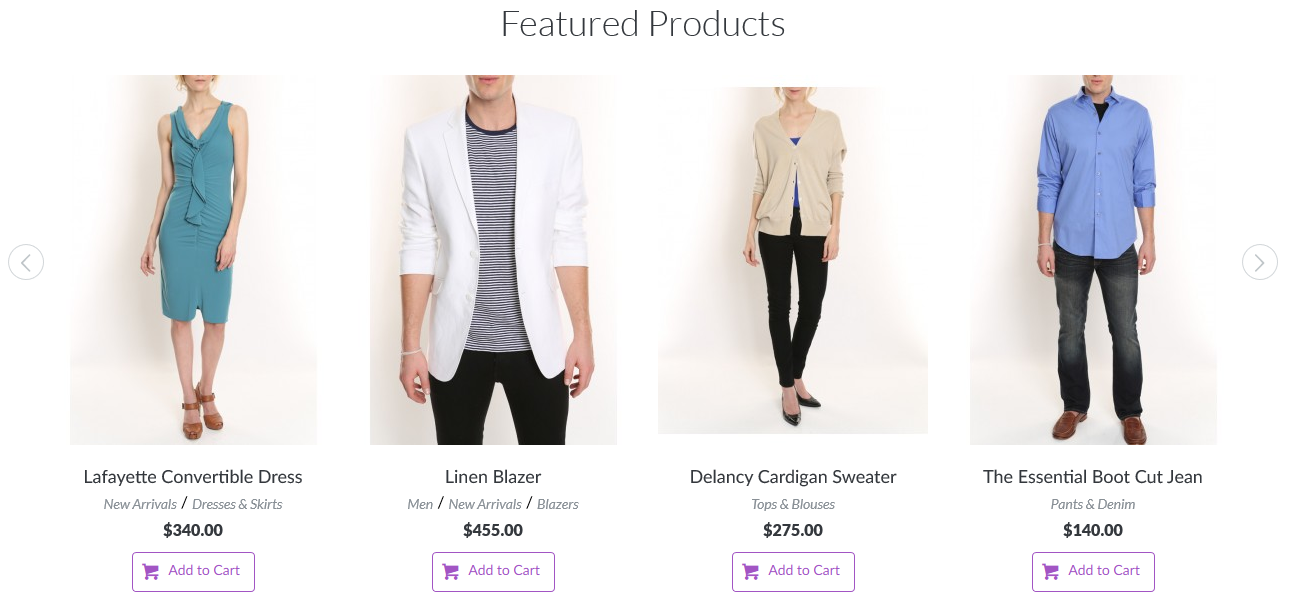
Featured Slider
Featured slider is a slider filled with featured products. It has several options from auto play, title, qty of products etc. Settings can be found on Illusion > Featured Slider. In order to add product(s) to the slider it is important to go to Catalog > Manage Products then to open a product you want to add. In General tab, at the bottom is field ‘Featured Product’. If value is set to Yes then product will be shown in featured slider.

Homepage featured slider will look:
-
Blog
Go to Blog > Settings, and there are configurational options:
-
Enable (Yes/No)
-
Show on homepage (Yes/No)
-
Route to Blog - url to blog within your site
-
Blog Title - shown on homepage slider, if enabled
-
Meta keywords
-
Meta description
-
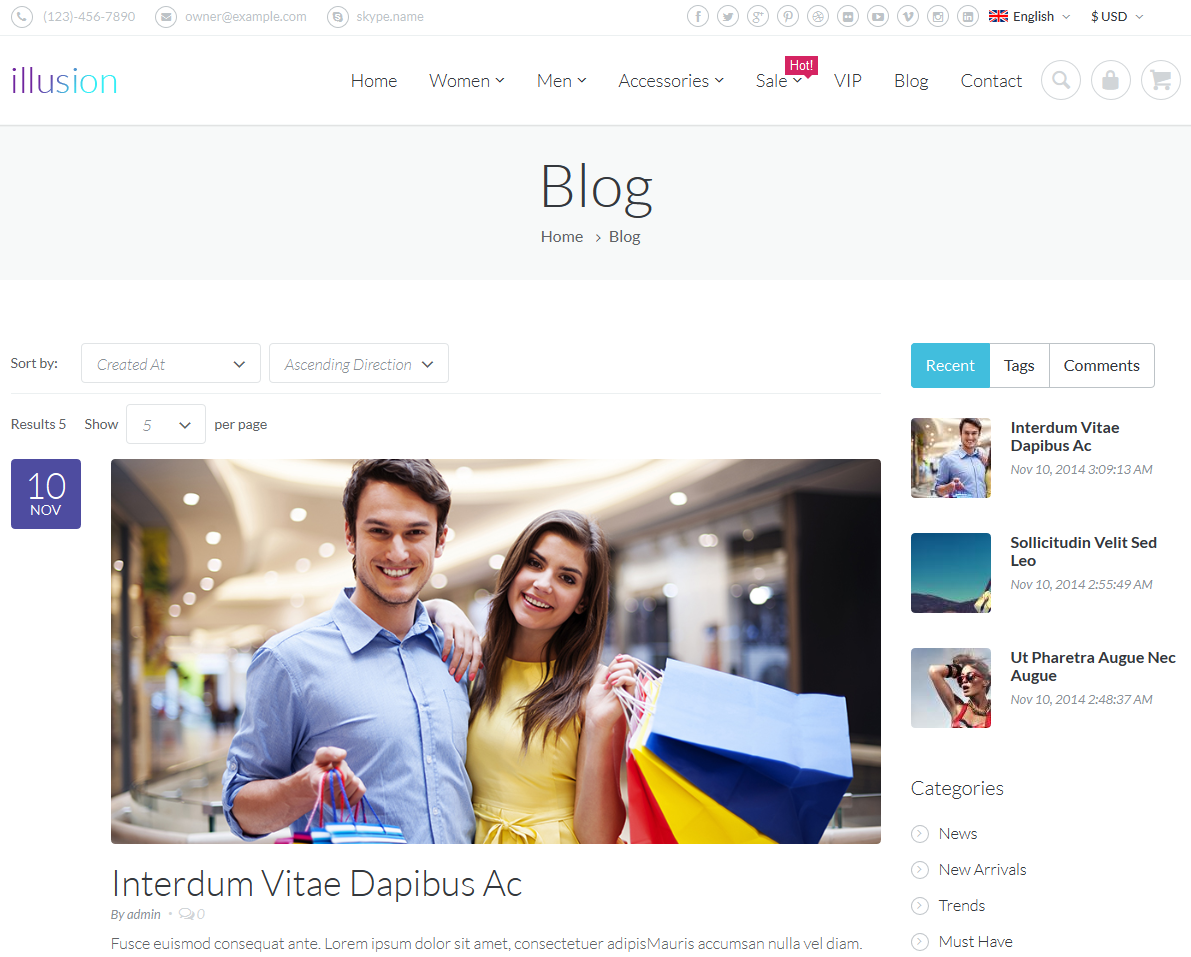
Page layout (all page layout types) type of the page where blog posts will be shown
-
Date format (4 different types)
-
Show Breadcrumbs (Yes/No)
-
Summary Character Count - Number of characters in a post to be displayed before it is truncated and the Read More link is added. 0 for unlimited.
-
Use Short content Field (Yes/No)
-
Parse CMS Tags in Post Contents (Yes/No)
-
Posts per Page (number)
-
Use categories ID in Post URLs (Yes/No)
-
Show bookmarks in lists (Yes/No)
-
Show bookmarks in posts (Yes/No)
-
Enable Left Menu (3 options)
-
Enable right Menu (3 options)
-
Recent posts (number)
-
Tags to display (10)
-
Enable comments (Yes/No)
-
Login required to comment (Yes/No)
-
Auto Approve Comments (Yes/No)
-
Logged in Auto Approve Comments (Yes/No)
-
Send Emails to (email address)
-
Email Sender
-
Email Template
-
Comments per page (number)
-
Enable ReCaptcha (Yes/No)
-
ReCaptcha public key
-
ReCaptcha private key
-
Rss Feed
-
Enable Blog Rss Feed (Yes/No)
-
Rss Feed Image (Url to the image)
-
Rss Posts to Show (number)
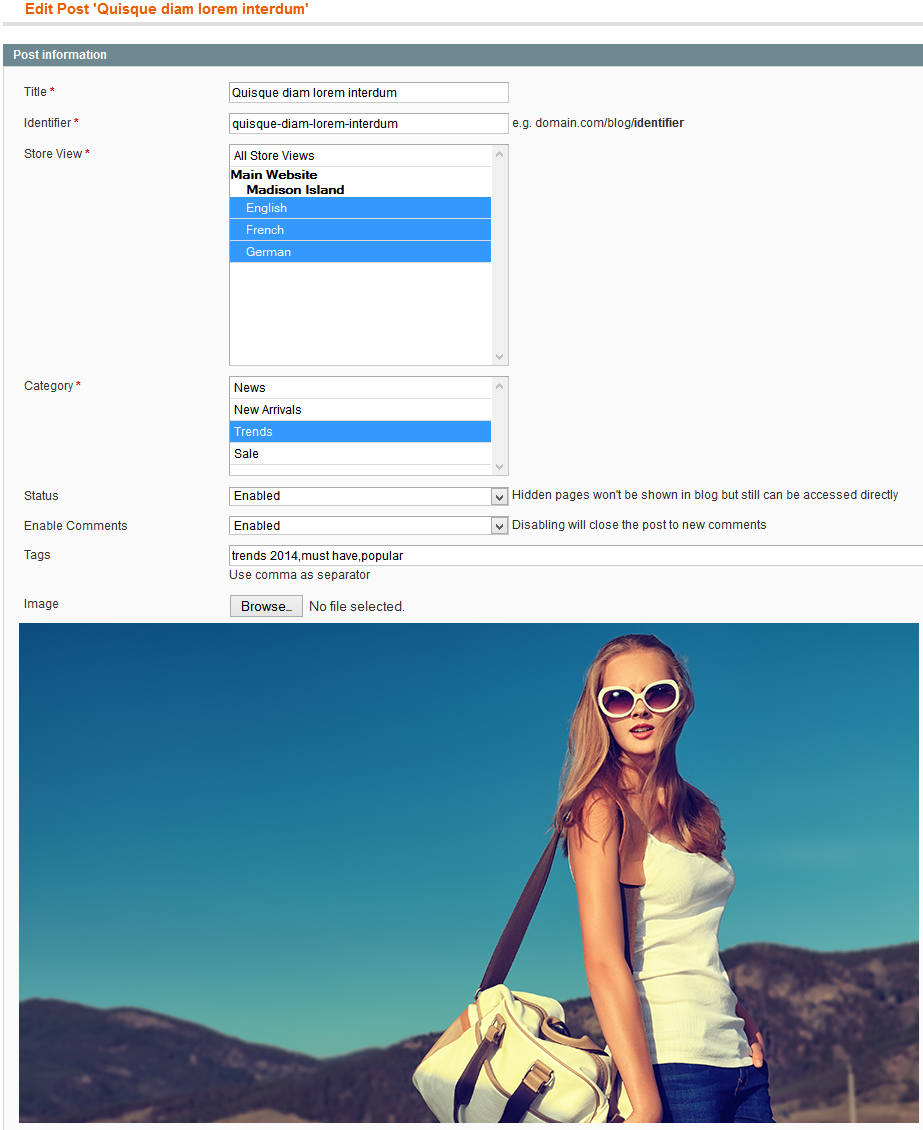
In order to create a blog post, open Blog > Add post. Add title, identifier, store view, category, status, enable comments, tags. Also you can upload blog image, which will be added as a leading image to: blog slider on homepage, previous blog posts in footer, and on regular blog pages.
Inside homepage blog slider will look:
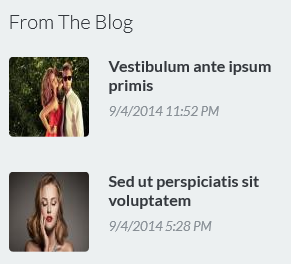
Inside footer previous blog posts block (if footer type in Illusion > Settings, Footer tab, is set to Footer 2 or Footer 3):
-
Brands
-
Brand attribute
-
First of all, to show brands, you will need an attribute which will store the information about brands. By default there is an attribute ‘manufacturer’ in Magento which you can use for this.
If you decide to create your own brand attribute, important thing is to select right type. For brands is important to select ‘drop-down’ in Catalog Input Type for Store Owner field.

This type of attribute will let you define a list of values (aka list of brands) available for products.
-
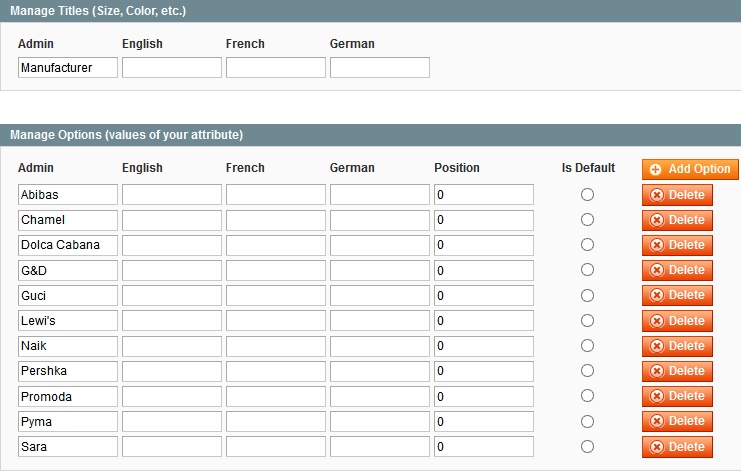
Brand names and image file names
Open ‘Manage Label / Options’ of your brand attribute and add values (names) which you would like to be shown on product page as brand option.
-
Brand images
In order to add image to a brand, it is important to follow the next rules:
-
Replace all uppercase letter with lowercase letters.
For example if brand has name ‘Adidas’ create an image with name adidas.png. Extension png or jpg can be set in admin configuration Illusion > Brands

-
Define the word separator.
It is recommended to use default separator: a single hyphen (-), but you can your own.

-
Replace single space with the separator:
Dolce Gabbana → dolce-gabbana.png
-
Replace single special characters (non-letter and non-digit characters such as
apostrophe, dot, ampersand, percent sign, exclamation mark etc. ) with separator:
McDonald's → mcdonald-s.png
AT&T → at-t.png
Amazon.Com → amazon-com.png
Coca-Cola → coca-cola.png
-
Replace series of white space and special characters with a single separator:
J.P. Morgan → j-p-morgan.png
-
Replace language specific symbols and characters (e.g. letters with diacritical marks) with letters from latin alphabet:
Citroën → citroen.png
Crédit Agricole → credit-agricole.png
-
Upload images
Using FTP client upload your brand images to the following directory
media/wysiwyg/illusion/brands/
-
Brands configuration
Open Illusion > Brands, and you will find following configuration fields:
-
Enable Module (Yes/No)
-
Brand title, will be used in slider as title
-
Brand description, will be used in slider as description
-
Brand attribute code (as described above will be used as identifier of the attribute which contains the information about brands)
-
Brand image file extension (default png)
-
Brand Logo Link (link in brand slider) with several options.
-
Url separator (default -)
specify character which will be used as word separator in URLs of brand pages. Hyphen (-) is the recommended character. Other separators, such as underscores (_) or plus-signs (+) should be avoided.
-
Show all brands (Yes/No)
if set to Yes, all existing brands will be displayed. If set to No, you will be able to select brands in the field below
-
Brands Assigned To Products (Yes/No)
if set to Yes, display only those brands, which are currently assigned to products
-
Brands Assigned To Products In Stock (Yes/No)
if set to Yes, display only those brands, which are currently assigned to products which are in stock
-
Add brands on homepage
In order to add brands on homepage for example, please open CMS > Pages and open yours home page. In Design tab add xml:
<reference name="content">
<block type="illusion_brands/brands" name="illusion.brands.slider" as="illusion.brands.slider" template="brands/brand_slider.phtml"/>
</reference>
On homepage, brands will look like this.

-
Newsletter promotional popup
This extension shows popup with newsletter subscribtion form, and suggested to subscribe and get free gift coupon (e.g 5 euro.) for it. If customer has small coupon he want to buy much more. And you have customer email and can send newsletter.
Configuration can be found on:
Illusion > Newsletter popup
-
General Configuration

-
Background Color: Color for loader background
-
Background Opacity: Opacity for loader
-
Loading image: Loader image
-
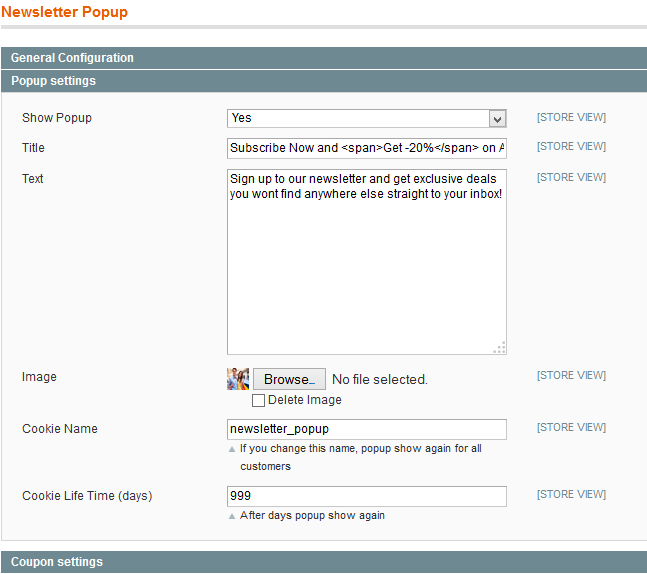
Popup Settings
-
Enable popup: Yes/No
-
Title: Title of popup
-
Text: Text bellow title
-
Image: By default extension comes with default image, but you can upload any one you want, or even delete this one without adding new.
-
Cookie: Name of cookie. If you change this, popup will show again for all customers
-
Cookie Life Time: Life time of cookie. After this time, popup will show again
-
Coupon Settings

-
Send coupon: enabled or disabled coupon function
-
Shopping Cart Price Rule: It relies on your price rules. If you don’t have any coupon this is how you are going to do that:
Go to Admin -> Promotions -> Shopping Cart Price Rules ->Add New Rule. Choose "Coupon – Specific Coupon“ and checked "Use Auto Generation"

-
Length: Coupon code lenght, excliuding prefix, sufix, and separators.
-
Format: Coupon code format
-
Prefix/Sufix/Dash: Coupon code settings.
Next: Add coupon code to newsletter success email. First go to Admin -> System -> Transactional Emails -> Add New Template OR edit your exist template. Insert this code in your template: {{var subscriber.couponCode}}

Last but not the least: Set before created template as primary template. Go to . Go to Admin -> System -> Configuration -> Newsletter -> Subscription Options -> Success Email Template -> Choose your template.

-
Accept Cookies
Accept cookies popup will appear on every page, until of accept cookies button is pressed. And this is by the low of EU. If you would like to disable this, open settings on url Illusion > Accept Cookies and set popup to No.

-
Show Accept Cookies Popup: Yes/No
-
Background color: color of background
-
Background opacity: opacity of background
-
Cookie name: as name said, name of the cookie which will be used for saving
-
Cookie life time
-
Message: info message which appears on popup
-
Accept Cookie Title: Title for accept cookies link
-
Read More Title/Read more Link: information about read more title/link
-
-
Social Connect
-
This theme comes with Inchoo Social Connect Magento extension, which includes registering with Google, Facebook, Twitter and Linkedin accounts.
Configuration Social Connect
Client keys and secrets obtained in previous sections are to be placed inside appropriate Social Connect tab input fields accessible at System > Configuration > Customers -> Customers Configuration page inside your Magento admin.

Creating Google Project:
First step to creating Google Project and obtaining Google client ID and secret key is navigating to Google APIs Console. To successfully complete process of creating Google Project you will need following pieces of information:
-
Authorized Redirect URIs: http://www.example.com/socialconnect/google/connect/
-
Authorized JavaScript Origins: http://www.example.com
Don’t forget to replace http://www.example.com with your store web address. Here’s gallery of screenshots that should securely guide you trough this process:


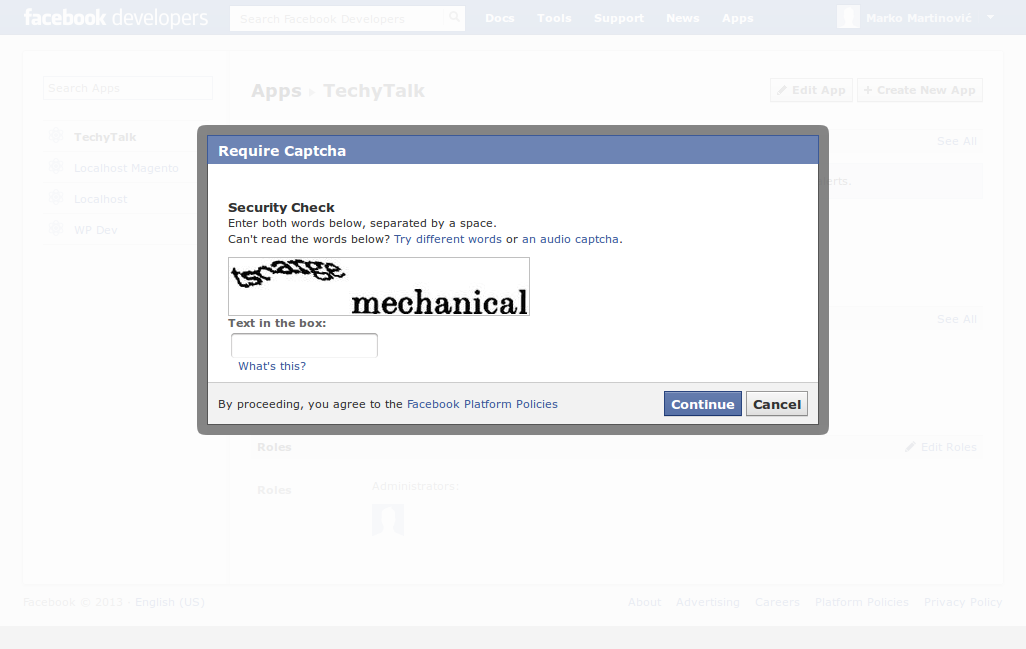
Creating Facebook App
Creating Facebook App is somewhat similar to creating Google Project. Again, first step is navigating to Facebook Developers page. There you will need following pieces of information:
-
Authorized Redirect URIs: http://www.example.com/socialconnect/facebook/connect/
-
Authorized JavaScript Origins: http://www.example.com
Don’t forget to replace http://www.example.com with your store web address. Here’s gallery of screenshots to guide you trough this process:


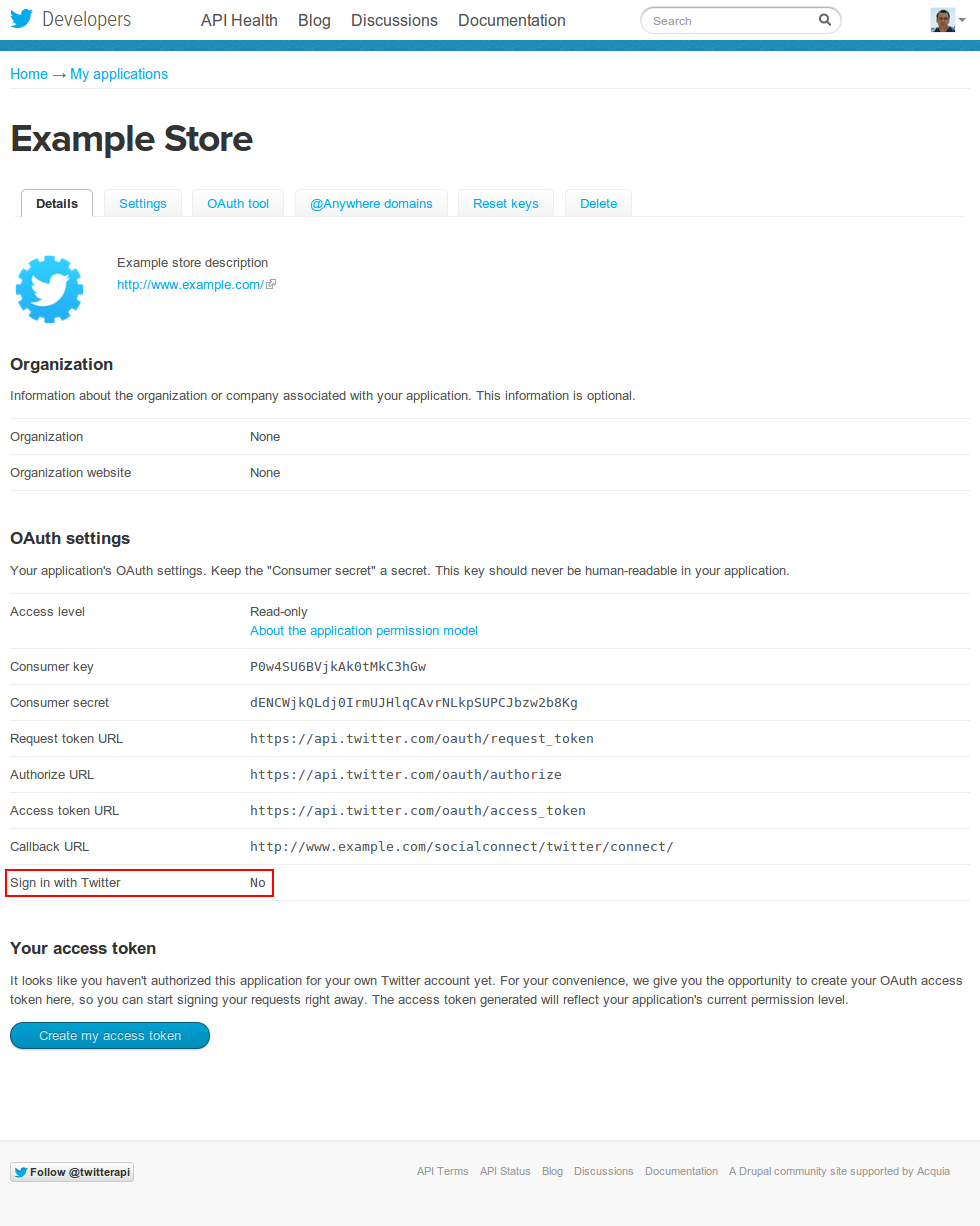
Twitter Application
First step to creating Twitter application is navigating to Twitter Developers page. After clicking at Create a new application button you will be requested to provide following information:
-
Callback URL: http://www.example.com/socialconnect/twitter/connect/
-
Website: http://www.example.com
Don’t forget to replace http://www.example.com with your store web address. To take advantage of Inchoo Social Connect Twitter related features, you will also need to enable Sign in with Twitter after creating your Twitter Application. Here’s gallery of screenshots to guide you through this process:


3. Menu
-
Simple Menu
By default Illusion theme has configured simple menu, which relies on category tree and shows categories and subcategories. Those settings are in section 2.1.5
-
Mega Menu
-
Enable Mega Menu
-
If you need more advanced menu, in a way to add new custom things, blocks, links etc, Illusion theme comes with Mega Menu extension which is perfect for this.
To enable it, goto MagenTheme → MT Megamenu → Configuration to enable and config module:


-
Import categories to Mega Menu
Go to MagenThemes → MT Megamenu → Manage Menu Item.


-
Add new Mega Menu
Go to MagenThemes → MT Megamenu → Manage Menu Item.
In the left column, you can see tree of megamenu, choose a menu you want to add sub menu, click the Add Sub menu button.
Enter information in the required fields.
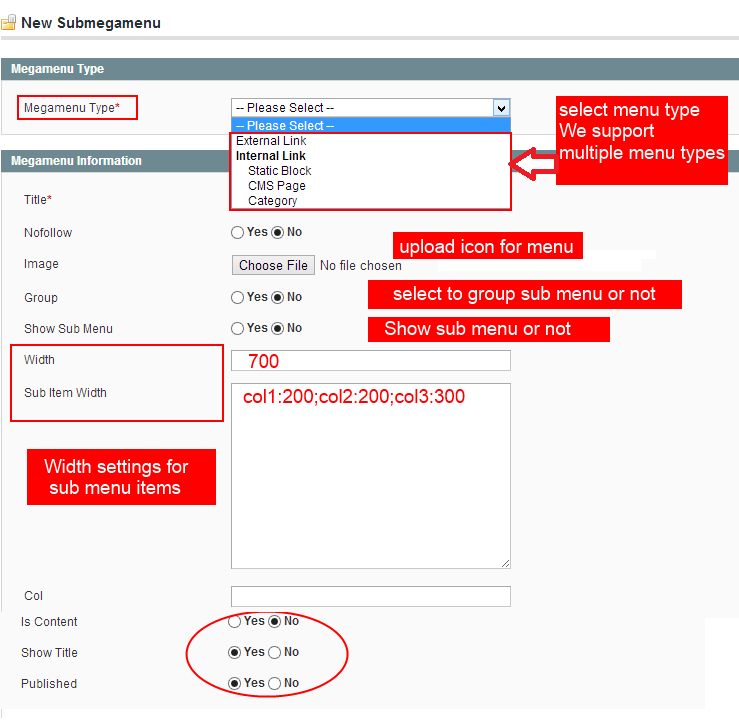
-
Menu type
MT Mega Menu module supports multiple types of menu (4 types in total)

Each type of menu will give you different configuration and outlook. Let see configuration and outlook of each menu type.
-
External link
The menu will be linked to the entered link in back-end.

-
Static block

-
CMS Pages

-
Category
The menu will be linked to the selected category

-
Add columns to Mega Menu
One of the most advantages of MT Mega Menu is showing visitor many related navigation options in just one click. If you want to present menu items as clearly as possible, it’s a good idea to use columns within your Mega Menu.
Instead of displaying all submenu contents in a single column, MT Mega Menu can help you in arranging many submenu items in different columns by different categories.
Please see the following example:

In this example, three columns are used:
-
The first columns shows Day, Dress,...
-
The second column shows Life Style, Bras,...
-
The third column shows a static block.
Put the items in 3 column instead of just one:
-
Let’s have a look at the menu items under Magenthemes → MT Mega Menu → Manage Menu Items
-
You can see all of categories. Choose WOMEN.
Here you can see how I’ve added to Width, Sub Item Width, and Col Titles
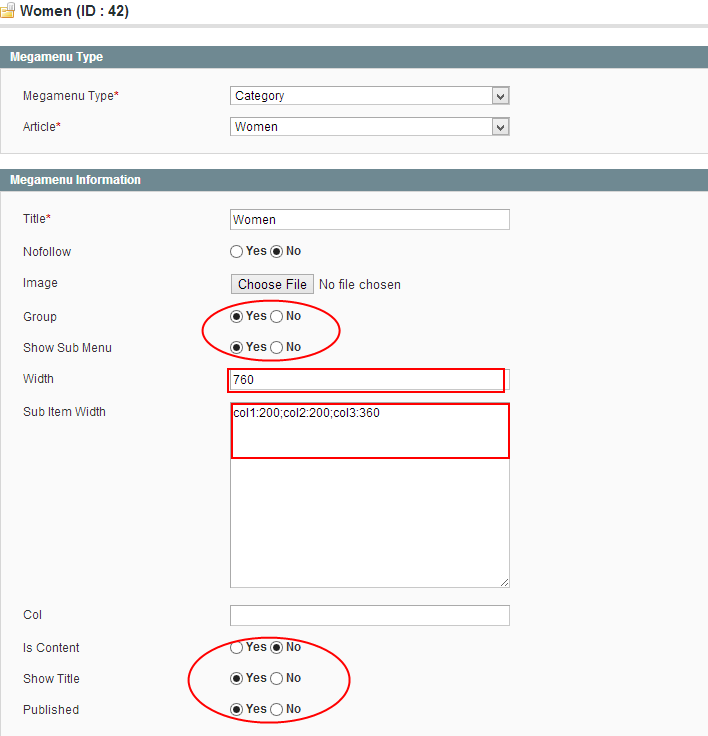
After that, click the Save Megamenu button to apply your changes.
In the first column: The first column shows Day, Dress...
-
Select Day, and see how to set up:

Then, click the Save Megamenu button to save.
In the second column: shows Life Style, Bras,...
-
Choose Life Style, and see how to set up:

In the third column: shows a Static block.
-
Click the Add Sub mega menu to create Static Block sub menu.
Please see the following image of config:

After that click Save Megamenu button, go to frontend, and refresh the page to see your changes.
-
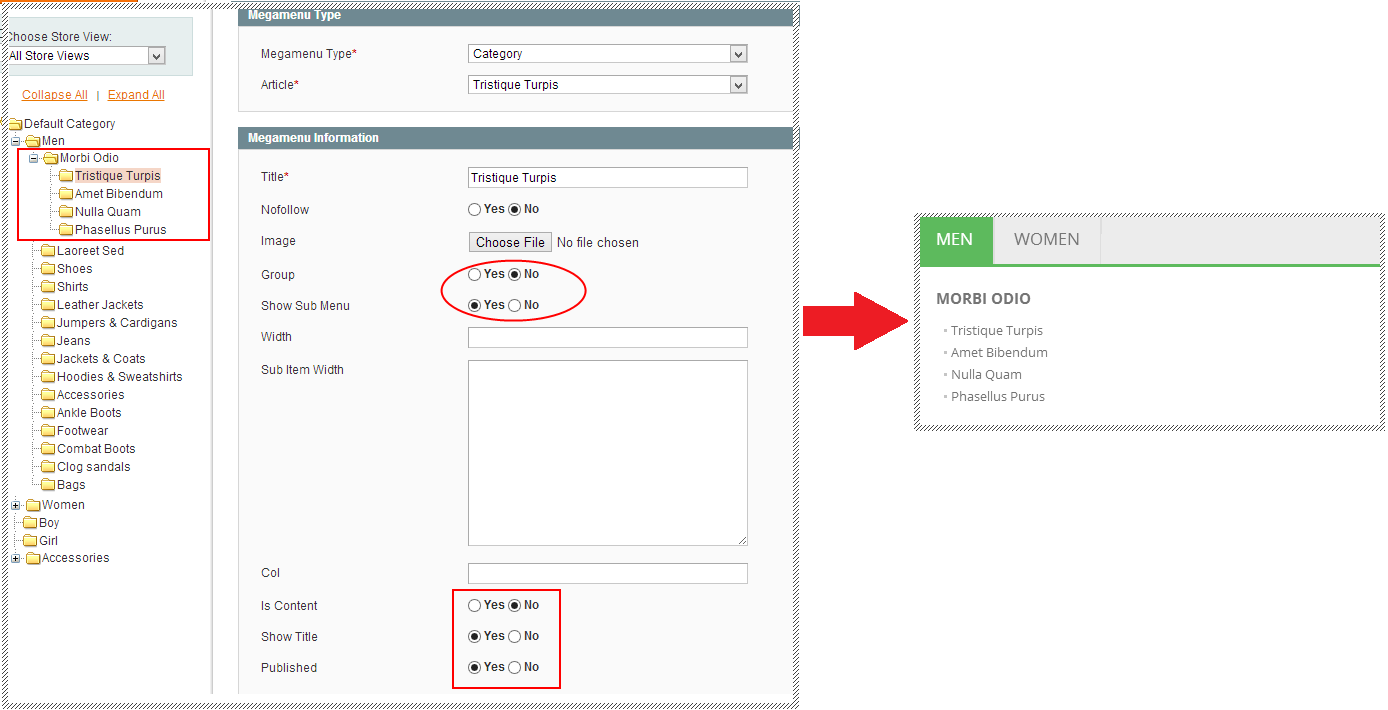
Group sub items to Mega Menu
In this step, we’ll show you how to group all the sub items of one Menu Item. In this example, it’s MORBI ODIO, and it will display one column.
Now Go to Magenthemes → MT Mega Menu → Manage Menu Items, open our Megamenu Parameters, you could go to the setting of one Menu Item and change Group to NO and Show Sub Menu to YES, like in this picture:
4. Sliders
-
1. Smart Slider
Smart Slider 2 gives you the ability to present your content in a professional and visually stunning way. The perfect all-in-one responsive slider solution for Magento.
Here is a link of how to create Smart Slider in Magento:
https://www.youtube.com/watch?v=FpAM5bYKJV8
After you finish creating and customizing Smart slider, you can use few different options to add it on Magento site:
http://www.nextendweb.com/wiki/smart-slider-documentation/publishing-slider-magento/ where <value>7</value> represent the id of the slider you created.
-
Revolution Slider
MT Revolution Slider is an amazing layered slider for Magento.
Create a responsive(mobile friendly) or full width slider with must-see-effects and meanwhile keep or build your SEO optimization (all content always readable for search engines). See the heaps of custom transitions/animations for each object on the page! Customize this slider with our convenient drag&drop backend to your very needs. This extension features tons of unique transition effects, an image preloader, video embedding, autoplay that stops on user interaction and lots of easy to set options to create your own effects. We have developed a friendly backend that lets you manage your slider like no other extension yet made for Magento. You can design your slider with no css or jquery needed an come out with amazing effect.
-
MT Revolution allows users to add new and edit all features an slider
-
Add and edit items to slider
-
Preview slider after add and edit in manager slider
-
Export slider to file backup after add and edit in manager slider
-
Delete many slider in manager slider
-
Allow users to add new and edit many layer slider in slider.
-
Add and edit items layer in slider
-
Allow Users to edit many effect in layer
-
Allow Users to upload videos and images edit effect it in layer
-
Allow Users to style color and font in layer
-
Allow Users to edit all features in layer
-
Allow users to import slider backup and import example for revolution slider.
-
Allow Users to import file backup slider
-
Allow Users to import example revolution slider
-
Allow users to manager add and edit widget revolution slider.
-
Add new and edit widget revolution slider
-
Add many widget revolution slider
-
Display revolution slider all page, category, product or display it every page.
-
Display revolution slider many sliders on page
-
Adding Revolution slider on page.
Revolution slider allows adding slider to a page through widget instance.
After creating revolution slider open CMS > Widgets > Add new widget instance. As type set ‘MT Revolution Slider’ and as package ‘illusion/default’. Also set name and on which store you want to be shown (All Store Views or something else). Then open Widget Options and set your previously created slider, and click save. In this way you have created widget instance of Revolution slider.
Now you can open any page and add widget.
For example open your home page and on ‘Content’ tab click on link ‘Insert widget...’. In the list of created widgets should be listed your previously created widget. After choosing it, click on Save the page. This is how you can add widget on any page you like.
Also you can for example, if you already have Smart slider imporgted on the same page, delete the <block type="nextendsmartslider2/slider" name="smartslider1">...</block>
More information about Revolution Slider with demo examples can be found here: http://www.zooextension.com/mt-revolution-slider-responsive-magento-extension.html
5. Home page
In order to get Illusion homepage full width preview you should first set for your home page layout ‘Illusion Home Page’
-
Slider
Please take a look how to add slider in cms page in section 4.1
-
Product in tabs
Product in tabs is place where you can group different type of products (featured products, products on sale, new products and bestseller products).
Open your homepage and on Layout Update XML add block:
<block type="illusion_settings/settings" name="illusion.product.tabs" template="catalog/product/products_in_tabs.phtml">
<block type="illusion_featuredproducts/featuredproducts" name="f_p" as="f_p" template="catalog/product/featured_products.phtml"/>
<block type="illusion_bestsellerproducts/bestsellerproducts" name="b_p" as="b_p" template="catalog/product/bestseller_products.phtml"/>
<block type="illusion_newproducts/newproducts" name="n_p" as="n_p" template="catalog/product/new_products.phtml"/>
<block type="illusion_saleproducts/saleproducts" name="s_p" as="s_p" template="catalog/product/sale_products.phtml"/>
</block>
-
Products separately (Featured, Sale, New, BestSeller)
-
bestseller block
If you need perhaps to add the separately you can use the same logic as above.
<block type="illusion_bestsellerproducts/bestsellerproducts" name="best" as="best" template="catalog/product/bestseller_products.phtml">
<action method="setData"><key>title</key><value>BestSeller Products</value></action>
</block>
With that difference that you can also set blog title, which will be shown above slider.
-
new block
<block type="illusion_newproducts/newproducts" name="new" as="new" template="catalog/product/new_products.phtml">
<action method="setData"><key>title</key><value>New Products</value></action>
</block>
Same situation is with other two: sale and featured products block.
for sale type should be ‘illusion_saleproducts/saleproducts’, template should be as in product in tabs, and for title you can put ‘Products on Sale’ for example.
-
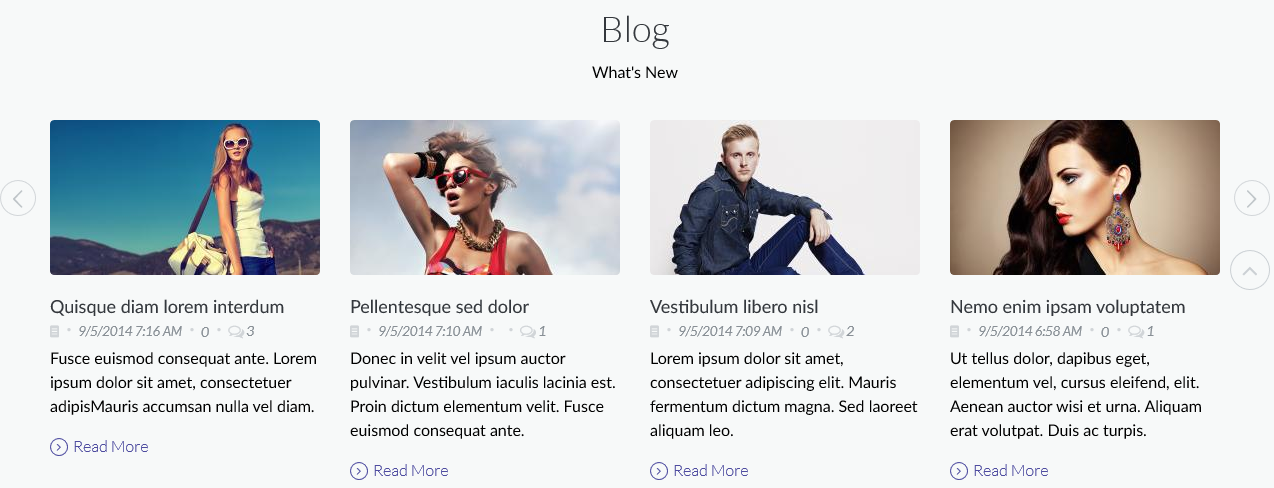
Blog
If you want to have recent blogs on home page, you can do it by adding following code
<block type="blog/blog" name="blog.home" template="aw_blog/blog_home.phtml"/>
-
Brands
Also Illusion theme has option for brands, but you have to create them first. Please take a look at section 2.8.
If you want to add them to the homepage add the following code:
<block type="illusion_brands/brands" name="illusion.brands.slider" as="illusion.brands.slider" template="brands/brand_slider.phtml"/>
6. 404 Error page
In order to set Illusion 404 error page, please open System > Configuration > Web > Default pages > CMS No Route Page and set ‘Illusion 404 Page’
7. Ad Banner
Ad banner like the name said, is using as banner ad block manager.
Go to Illusion > Ad banner > Configuration

-
Enable module Yes/No
-
AdBanner Width - width of the image inside banner
-
AdBanner Height - height of the image inside banner
-
Display randomly - Yes/No
-
Ad banner ID - if display randomly is set to yes banner id won’t be followed
-
Display Adbanner title - Yes/No
-
Display in left column - Yes/No
-
Display in right column - Yes/No
-
Display in content area - Yes/No
Now, open Illusion > AdBanner > Manage AdBanner. There you can create adbanners:

At the end it will look like this:

8. Custom tab on Product page
Each product has tabs: Description, specification and reviews. But if you need a place where you can add your custom content, Illusion has prepared solution for that.
Each product has attribute called ‘custom_tab’ in which you can add custom cms block
Open first CMS Block page and create some cms block. Copy blocks identifier.

Then open Catalog > Manage Products, and select product in which you want to add identifier:

It will look like this: http://velikorodnov.com/magento/illusion/black-nolita-cami.html
9. Contact us page is default magento page
For this page you can use settings like: setting you address - System > General > Store information.
Regarding other things. Open CMS block 'illusion_about_us_block' and there you can change text which will appear on contact us page.
Phone number, email, skype and address are data read from admin config. 'Store Contact Telephone' is for phone, System > Store email addresses > General Contact > Email is for email, Skype is read from Illusion > Theme Settings > Social. Address as for may is read from Store Information > Address.
10. Setting up RTL store
1. Create store. Open System > Manage Stores. Create Store View. Set name you wish 'Arabic' for example and set set code 'ar' for example. Save.
2. Go to System > Configuration. On the top left 'Choose Configuration Scope' set 'Arabic'.
3. Click on 'General'. In 'Locale Options' choose which locale (language) you wish to set for this store. For example 'Arabic (Saudi Arabia)'. Save Config.
4. Click on 'Design'. Open 'Themes' and uncheck 'Skin (Images/CSS)' and insert 'rtl' - this will use template rtl instead default which is using be ltr themes. Save Config.
5. Open System > Index Management. Reindex all items that are colored red, for which is important to do reindex.
6. Open CMS > Pages. Open Homepage and set that 'Store View' - All Store Views (if you want to set that Arabic and other store uses the same homepage)
7. Open the site on frontend. You will see among stores, store you just created and with rtl orientation.
8. You can set for this store (if you want) different coloring settings, header, footer - everything. By using the same rules (Setting the store on 'Choose Configuration Scope' and by changing configuration)
9. Enjoy.
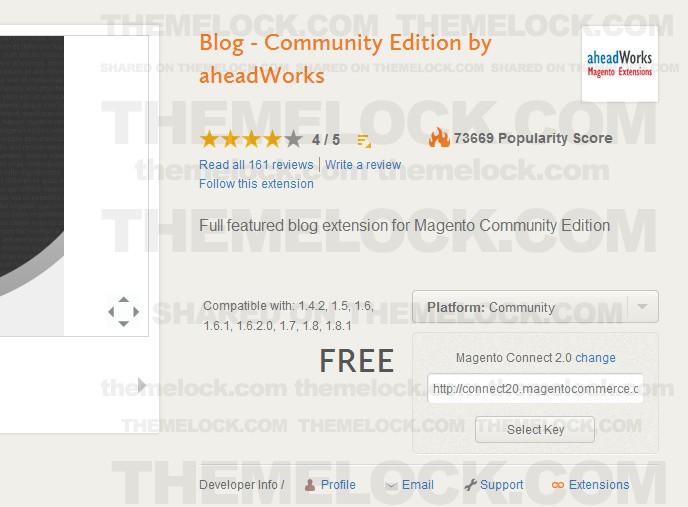
11. Blog
Our theme support popular community extension - Blog - Community Edition by aheadWorks. To add blog to your store you need to perform following steps:
Navigate to Blog - Community Edition by aheadWorks
Click on "Install Now" button
Select "Magento Connect 2.0" from dropdown
Tick on license agreement checkbox
Press "Get extension key" button
Copy extension key
Login to magento admin
Navigate to System > Magento Connect > Magento Connect Manager
Paste extension key in Paste extension key to install: field and press "Install" button

Press "Proceed" button

Check installation log in the bottom of the page

Open theme package, navigate to "AW_Blog" folder and upload its content to your magento install.
We have prepared a patch for the blog that will increase minor version number.
Right now if you install blog from magento connect, you will get 1.3.2 version. Our patch update it to 1.3.2.1
If they release new version - you can update if from magento connect and we will update our patch to the latest version.
Patch does not modify original blog data like posts, categories etc. It just add several fields to post table to support post images and contain modified templates / css.
Refresh cache - Cache Management
Now you can edit blog posts / categories. You will see new section in admin menu - Blog
12. Sources and Credits
I've used the following scripts:
- jQuery - JavaScript Library
- (http://www.pixedelic.com/plugins/diapo, no more supported, sorry), but improved a lot.
- colorpicker.js - JSColor is a simple & user-friendly color picker for your HTML forms. It extends all desired <input> fields of a color selection dialog.
- elevatezoom.min.js - Elevate Zoom works best using two images, one low resolution for the visible image, and one high resolution for the zoomed image.
- flickr.js - The Galleria Flickr Plugin is a small but useful plugin to allow your gallery to communicate with the Flickr API using some really simple commands
- greensock.js - Animating with code may seem intimidating at first, but don’t worry – the GreenSock Animation Platform (GSAP) was engineered to make it simple and intuitive
- jquery-ui-1.10.4.min.js - jQuery UI is a curated set of user interface interactions, effects, widgets, and themes built on top of the jQuery JavaScript Library
-
jquery.countdown.min.js - A jQuery plugin that sets a
divorspanto show a countdown to a given time. - jquery.easytabs.min.js - EasyTabs is a lightweight jQuery plugin to provide full tab functionality, while leaving the styling up to you
- jquery.iosslider.min.js - Touch Enabled, Responsive jQuery Horizontal Content Slider/Carousel/Image Gallery Plugin
- jquery.nicescroll.min.js- jQuery Custom Scrollbar is a plugin that lets you add fully customizable scrollbars to your sites instead of browser's default scrollbars.
- layerslider.kreaturamedia.jquery.js, layerslider.transitions.js - Responsive jQuery Slider Plugin
- jquery.easing.1.3.js - A jQuery plugin from GSGD to give advanced easing options
- jquery.fancybox-1.3.4.js - FancyBox is a tool for displaying images, html content and multi-media in a Mac-style "lightbox" that floats overtop of web page.
- jquery.flexslider-min.js - An awesome, fully responsive jQuery slider toolkit.
- jquery.isotope.min.js - An exquisite jQuery plugin for magical layouts
- jquery.themepunch.plugins.min.js - Slider Revolution is the highly acclaimed slide-based displaying solution, thousands of businesses, theme developers and everyday people use and love!
- jquery.themepunch.revolution.min.js - Create Custom Animations with our Brand-New Transition Builder
- jquery.tweet.min.js - put twitter on your website with tweet!, an unobtrusive javascript plugin for jquery.
- owl.carousel.min.js - Touch enabled jQuery plugin that lets you create beautiful responsive carousel slider.
- scripts.js - custom js
- styleswitcher.js - custom js switcher
- Inchoo social connect - great free Social Connect Magento extension.
- Inchoo prevnext - great free Listing out Previous/Next products in Magento.
- waypoints.min.js - Waypoints is a jQuery plugin that makes it easy to execute a function whenever you scroll to an element.
- MegaMenu - Magento Megamenu extension.
- Revslider - Magento revolution slider extension.
Brand logo images belong to https://dribbble.com/brandberry Clipart for the preview was used from http://depositphotos.com and http://www.modnakasta.ua/ IMPORTANT: clipart is not included in the stock file.
Once again, thank you so much for purchasing this theme. As I said at the beginning, I'd be glad to help you if you have any questions relating to this theme. No guarantees, but I'll do my best to assist. If you have a more general question relating to the themes on ThemeForest, you might consider visiting the forums and asking your question in the "Item Discussion" section or http://velikorodnov.ticksy.com/.
mad_velikorodnov
Changelog
This chapter is for people who had bought the theme before we made the updates. It will help them to update their current theme.
Update 1.1
Version 1.1. - for buyers who have version 1.0. (bought it before January 27th, 2015) and want to update their website to version 1.1.
IMPORTANT! Make a backup before the update!
Version 1.1!
Fixed issue with promotional popup for smaller sizes
What should you do!
Replace illusion_theme\skin\frontend\illusion\default\css\styles.css
Update 1.2
Version 1.2. - for buyers who have version 1.1. (bought it before Febuary 2nd, 2015 - Febuary 9th, 2015) and want to update their website to version 1.2.
IMPORTANT! Make a backup before the update!
Version 1.2!
- Implemented Google rich snippet;
- Implemented settings for animations on/off;
- Created cms block for credit cards block in footer;
- Added new Google fonts
- Bug fixing
What should you do!
Replace files from illusion_theme\
Update 1.3
Version 1.3.1 - for buyers who have version 1.3. (bought it before Febuary 28th, 2015 - March 13th, 2015) and want to update their website to version 1.3.
IMPORTANT! Make a backup before the update!
Version 1.3.1!
- If you bought template 11 March we added how to install Blog section
What should you do!
Read Blog section in Documentation
Update 1.3.1
Version 1.3. - for buyers who have version 1.2. (bought it before Febuary 9th, 2015 - Febuary 28th, 2015) and want to update their website to version 1.3.
IMPORTANT! Make a backup before the update!
Version 1.3!
- Metalanguage support for English, German, Spanish, French, Dutch and Russian
- RTL support
- Tabs improvement
- Fixed issue with quick ajax popup (showing configurable product options)
- Bug fixing
What should you do!
Replace files from illusion_theme\